Setting-Up Tubeless Tyres
Tubes or Tubeless?
All our Wheelworks wheels come complete with tubeless tape and valves installed. If you’re planning to use inner tubes, you can remove the tubeless valves by unscrewing the lock ring, removing the rubber o-ring, and gently pushing the valve back through the rim. The tubeless tape we use works equally well as rim tape for use with tubes, so you can leave that in place.
From now on we’ll assume you’re setting the wheels up with tubeless tyres, but suggest you follow along even if you’re using tubes, as there are some important characteristics of Wheelworks wheels which benefit from the specific way we mount the tyres.
Basic Equipment
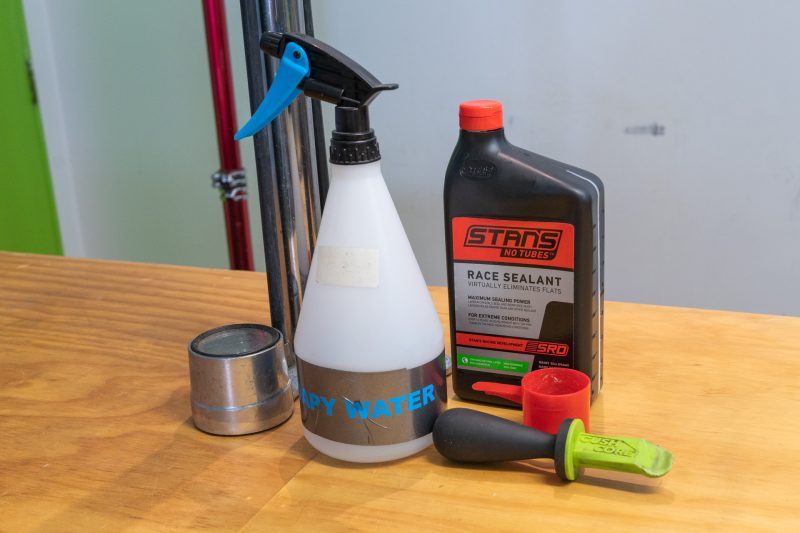
You’ll need some tubeless sealant (and something to measure it with), a high-volume air pump (or air compressor) to rapidly inflate your tyres, plus you may need a good quality plastic tyre lever and some soapy water to help with stubborn tyres.
Preparing the Valve & Tyre
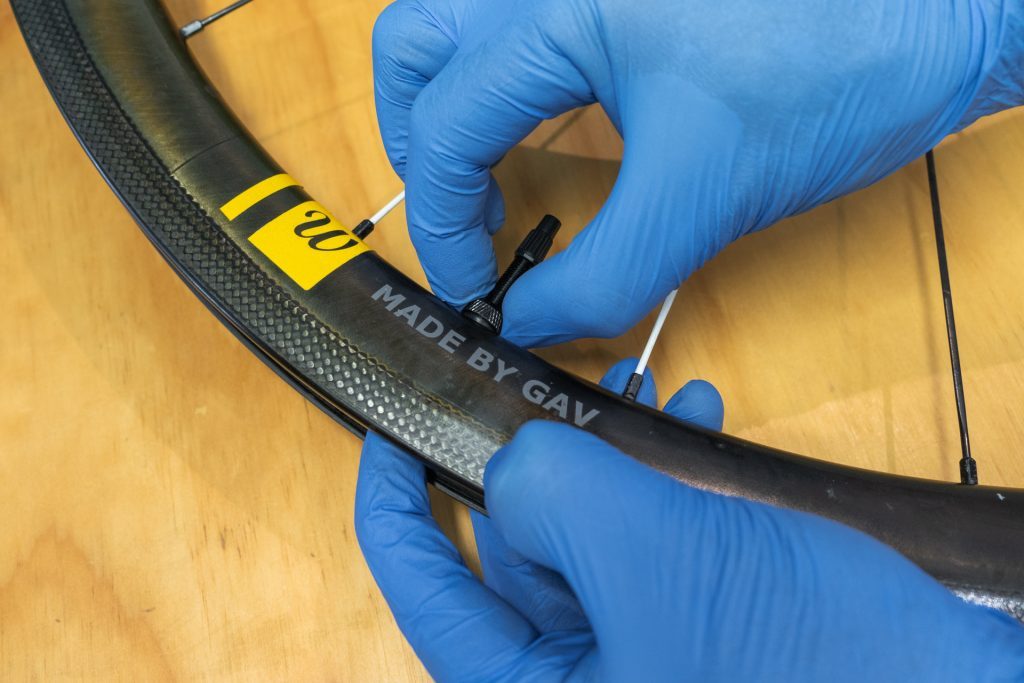
First up, check that the tubeless valves are finger-tight in the rims. We tighten them when we fit them, but sometimes they can loosen up a little in transit. Push gently down on the valve in the rim bed, while at the same time tightening the lock nut until it is finger tight. It is REALLY important not to overtighten the valve - overtightening can damage the o-ring seal and can make removing the valve very difficult if you get a puncture and need to fit a tube out on the road or trail.
If you’re fitting used tyres, make sure you clean them up first, and in particular remove any dried sealant on the tyre beads. Otherwise that dried sealant can prevent the tyre bead from settling into place properly on the new rim.
Fitting the First Bead
Next, fit the first bead of your tyre onto the rim. Check the tyre sidewall and if there’s an arrow showing the direction of rotation, make sure you fit the tyre in the correct orientation (with the wheel pointing straight ahead and the brake rotor mount on your left, the arrow should be pointing forward when it is at the top of the wheel). And for bonus points, make sure you line up with the tyre brand name with the valve! Things just look better that way.
The first bead generally goes on quite easily just with your hand, but if you’re struggling, a little soapy water will help. Make sure you fit the last part of the bead at the side of the tyre, away from the Wheelworks decals, so the vinyl doesn't get damaged.
Preparing the Second Bead
Once the first bead is on the rim, it would be time to put your tube in if you were using one. Here we’re setting things up tubeless, so we’ll move on to installing the second bead onto the rim. First of all, make sure that the bead already on the rim is sitting in the middle of the rim, or gutter. This is the lowest part of the rim bed, so it keeps the tyre loose and makes the second bead much easier to fit.
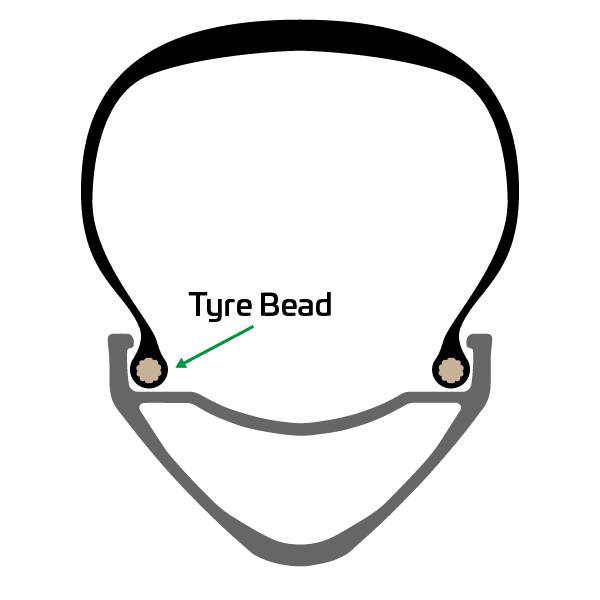
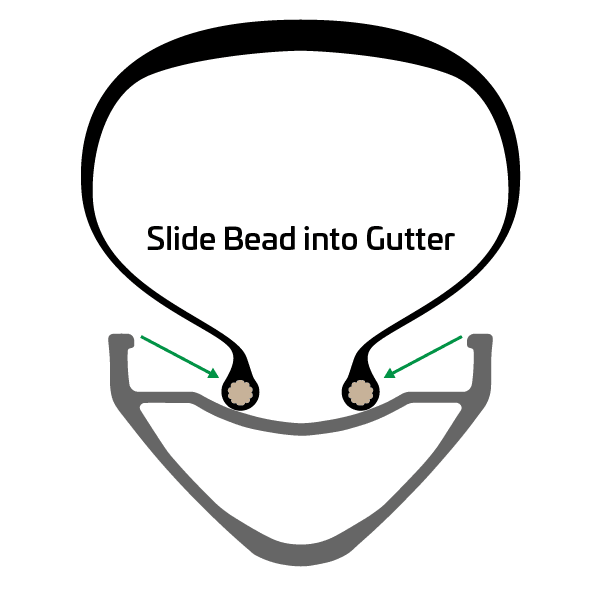
Beginning at the valve, start popping the second bead onto the rim, ensuring it also sits down in the gutter, and that you have one bead either side of the tubeless valve and neither is on top of the valve. Work around the wheel installing the bead, again working towards the side of the wheel, where there are no decals to damage. Once you have around three quarters of the bead on the rim, it’s time to pour in your tubeless sealant.
Adding Sealant
It’s much easier to do this if you hang the wheel on a hook or similar at this stage, with the open quarter of the tyre at the bottom. This keeps both hands free to measure and pour in the sealant, which can otherwise be a messy job. Measure the sealant according to the manufacturer’s instructions, and then carefully pour it into the tyre.
Once the sealant is in the tyre, slowly rotate the wheel again so the unmounted portion is at the top. This will bring the sealant out of the way, down to the bottom of the tyre. It’s time to get that final portion of tyre mounted.
Fitting the Second Bead
We’ve found that with the vast majority of tyre and Wheelworks rim combinations, it’s possible to finish fitting the tyre by hand, without the use of levers, if you are patient and take your time over it. First, make sure once again that both beads are sitting in the middle, or gutter, of the rim, and on either side of the tubeless valve. You can gently stretch each side up towards the unmounted portion, starting at the bottom and just gently pinching the tyre into the middle of the rim and round towards the top. When you get to the final part of the bead, gently roll it up and over from both ends, pushing up and away from you with the palms of your hands. If it’s really tight, you can use some soapy water to assist. If this doesn’t work first time, go back through the process again, pushing in and up from the bottom of the wheel towards the top. This will usually be enough now to push that last little bit of bead over the rim.
If you’ve tried this multiple times and still can’t get the last little bit mounted, you can VERY GENTLY work it over with a soft plastic tyre lever. You can damage both aluminium and carbon rims by using a tyre lever in this way, as well as damage the rim tape causing the wheel to lose it's tubeless seal; so please be very careful, and please note that any damage caused is not covered under warranty.
We've found the CushCore Bead Bro tool to be extremely helpful in holding the bead in place. It frees up both hands to carefully work the tyre into place, without risking damage to the wheel.
Seating the Tyre Bead
Now we need to inflate the tyre and push the tyre beads up into place on the rim. The secret to this stage is to get as much air into the tyre as quickly as possible, so if you have a high volume mountain bike floor pump, this will be ideal. Otherwise any floor pump should be able to do the job - you may just have to pump a bit quicker!. With the valve at the top, and the tyre beads properly located on either side of the valve, pump as hard and as fast as you can with your floor pump until the tyre starts to hold air and pop up into place on the rim. Persistence is key - sometimes it takes quite a few pumps before things seal up and the tyre starts to inflate. It can also help to put a little hand pressure onto the tyre above the valve - this keeps the tyre beads down in the gutter either side of the valve with a good seal.
If you’re really struggling with this part, you can try removing the valve core before fitting the pump - this allows the pump to move more air through the valve. Just remember that when you remove the pump, all the air will come out at once! The tyre bead will usually stay correctly seated however, so you can pop the valve core back in and inflate the tyre again.
You can also use a CO2 inflator for a quick burst of inflation - this has the same effect as using an air compressor, which is the ideal method if you have one.
Checking the Bead is Properly Set
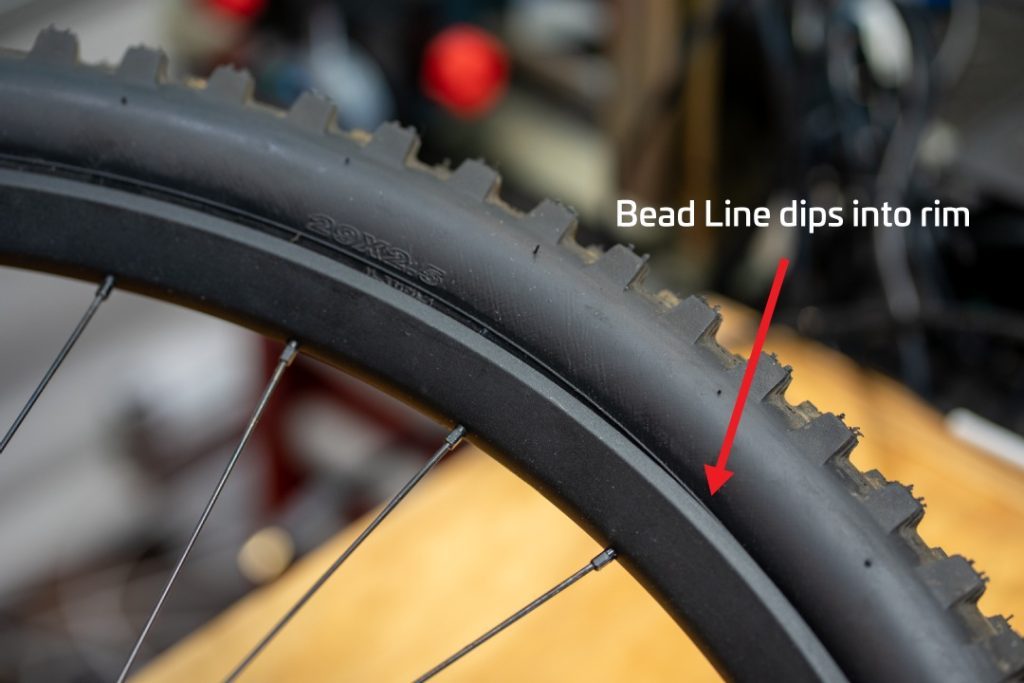
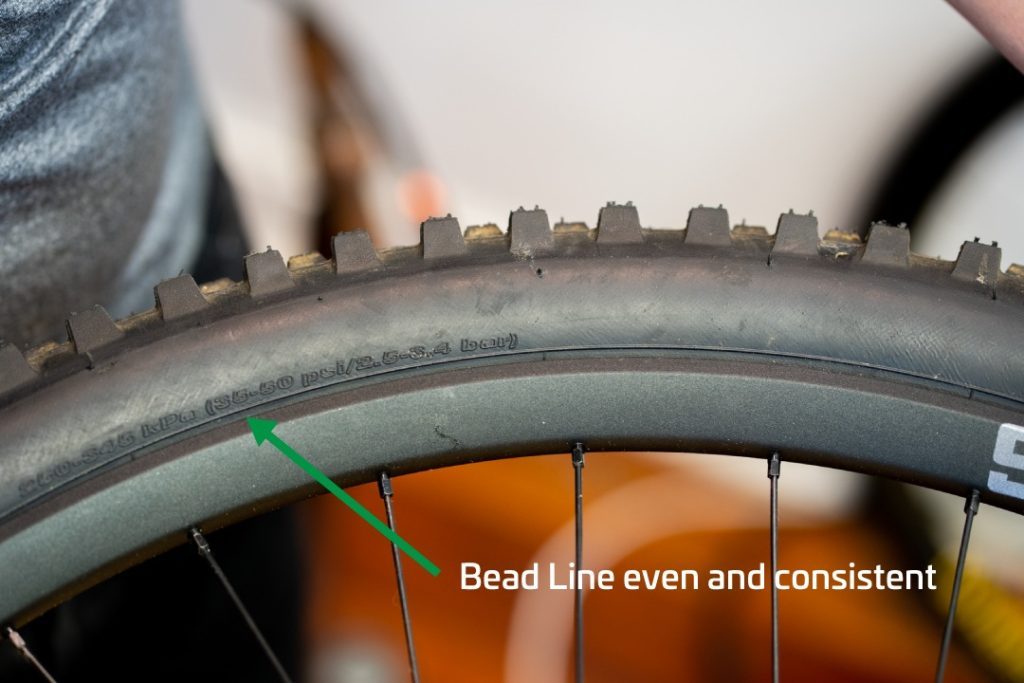
Now that the tyre is inflating, you’ll hear some loud pops as the bead seats onto the rim. Keep pumping until you’re near the maximum recommended pressure for your tyre and rim combination. Check around the wheel for the tyre bead line - a thin line around the tyre near the rim, which should be an even distance from the rim all around the tyre. If the bead line dips down or disappears anywhere on the wheel, the tyre has not seated fully at that spot. To correct this, deflate the tyre again and push the bead away from the rim at that point.
If it’s a used tyre, check again that there’s no old dried-up sealant stuck on the tyre bead at that point, and clean it up if there is. Apply some soapy water to the tyre bead and rim, and re-inflate the tyre. Check the bead line again and when everything is even and the tyre is properly seated, you can slosh the sealant around inside the tyre to make sure it reaches all the spots where it needs to seal. Give it a good shake and spin to coat everything inside the tyre. If you’re not going riding straight away, you can keep the tyre pressure nice and high to encourage the sealant to find any tiny leaks and seal them up, but remember to adjust to your desired riding pressure before you go out riding.
With many tyres, you’ll find there are still some tiny pores which need some time and a few rides to fully seal, so expect to keep topping your tyre pressure up for the first few rides until everything is settled.
We hope you’ve found these instructions helpful - if there’s anything else you need advice or assistance with, please reach out to us.

