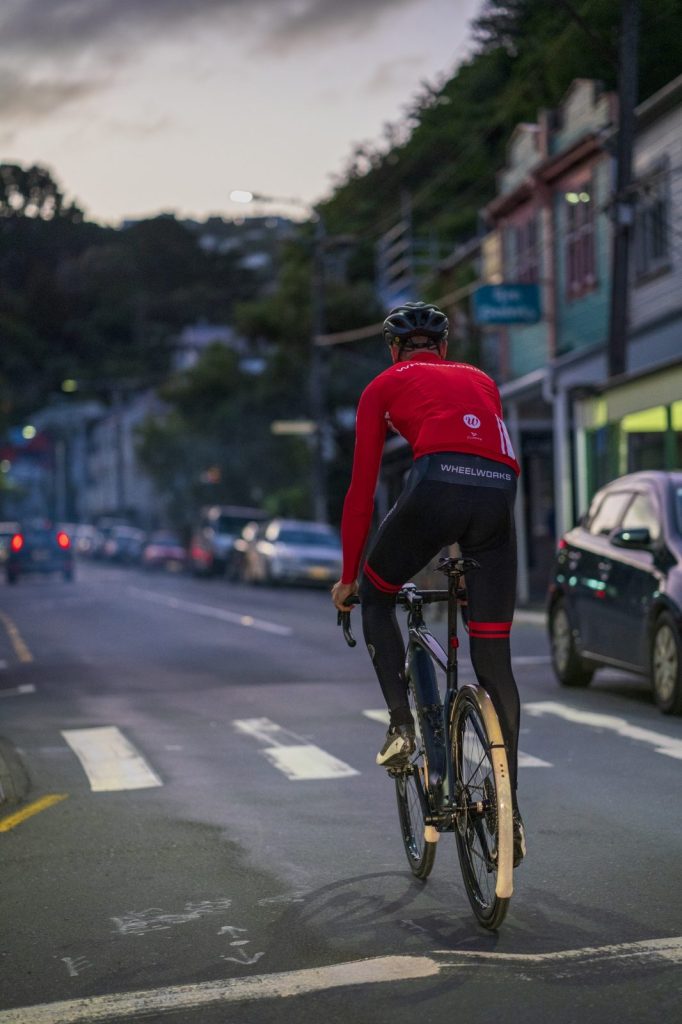
SuperPunteur – Specialized Creo ebike
Article written by Tristan Thomas April 2020 and published by Cycling Tips June 2020
This week’s Bikes of the Bunch is a first for us. It’s an e-bike. And while at first glance it looks like the e-bike we took with us to our Gravel Field Test in Sedona, Arizona, it’s quite different and even more interesting.
The bike’s owner is lifelong bike geek Tristan Thomas, founder and owner of New Zealand-based Wheelworks. Here, Tristan tells the story of how an e-bike for commuting came into his life and dives into the exact steps taken to personalise it. Nerd alert!
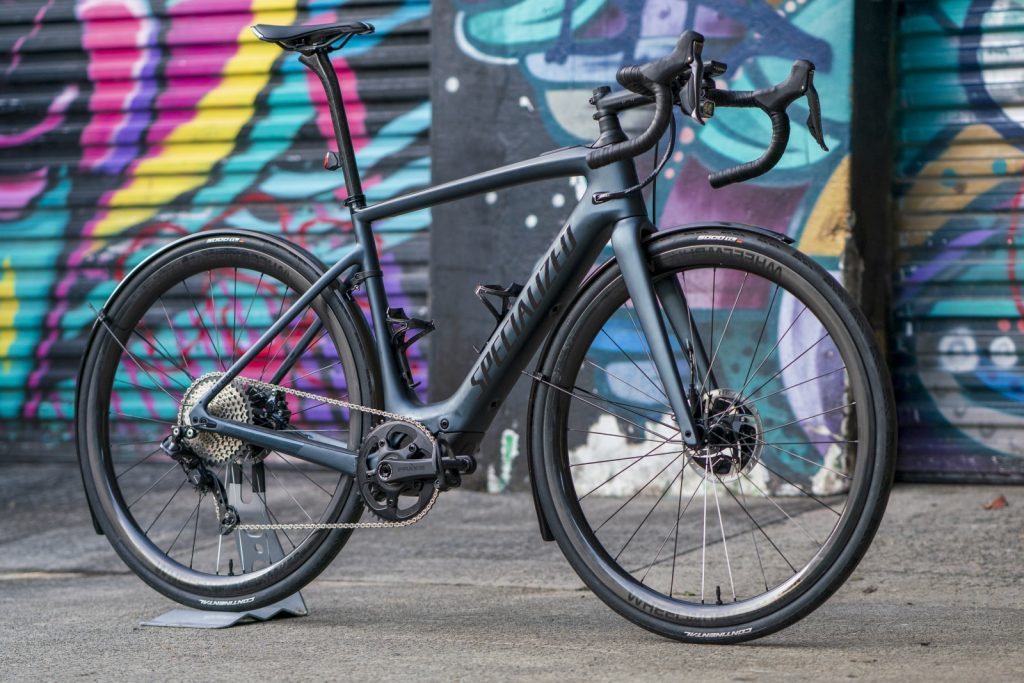
I’m not yet 40 years old and still fit enough to hold a few KOMs, so I’m certainly not the typical e-bike owner. However, once the idea to get one for the morning commute was implanted in my head I decided to go with it and make it the raddest machine to roll through Wellington on a windy Monday morning. While many retreat to Zwift over the winter I wanted a way to indulge my inner geek, play with some new tech, and see what all the e-fuss is about.
E-bikes are so so friggin’ cool! I love the tech aspect, I love the transformation of our urban streets that commuter e-bikes have brought, I love the stories of mountain bikers going further and longer with e-bikes, and I can’t wait for e-road and e-gravel bikes to add another niche to this amazing sport. Mixed-surface Hammer Series-style events? Oh yes!
I’d been looking around for a replacement for my aging Vespa and had tried some of the new breed of electric 50cc scooters as well as commuter e-bikes like the Kona Ute but none of the options did what I wanted as a weekday get-around. Retiring my noisy ageing two-stroke would be nice but the Vespa is just so practical for nipping to work, the supermarket, and home.
I’ve got two options to ride to work whilst avoiding traffic: Drop straight down the hill and have 12 minutes of traffic-filled descending, or ride through a beautiful farm valley which takes about 90 minutes. This route is just a little too far and too hilly on a wet morning with a howling gale in the depths of winter.
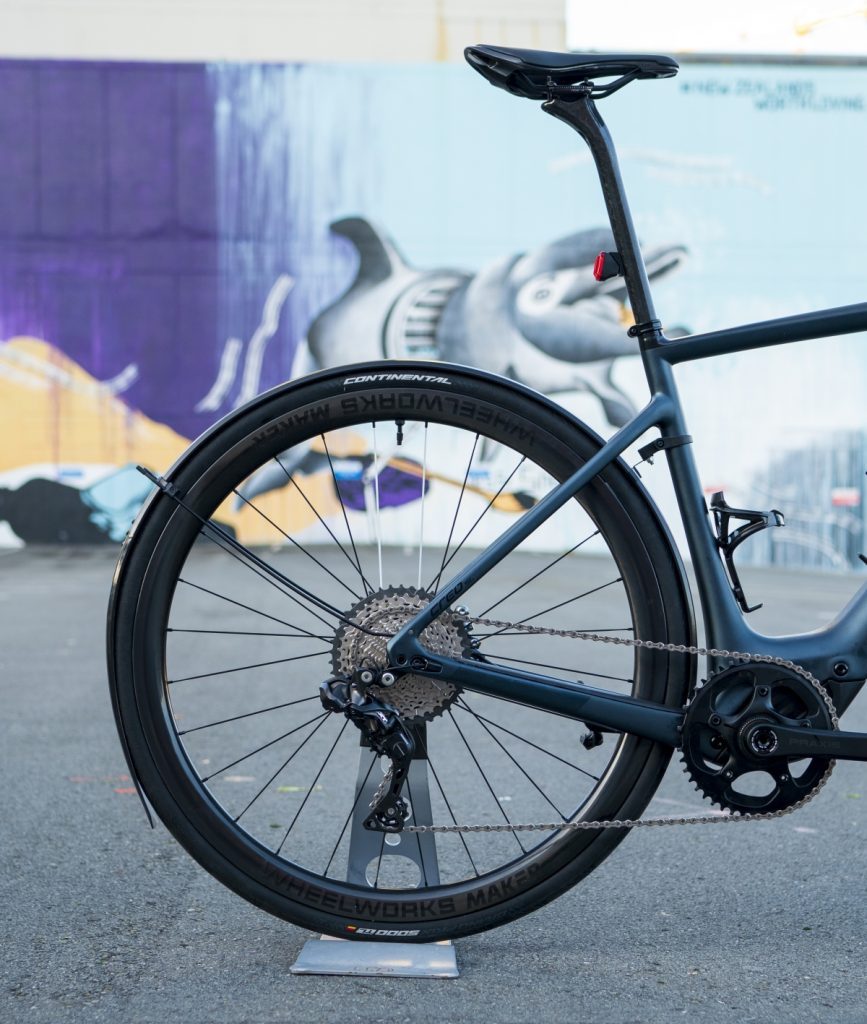
Full length fenders and integrated lights make this an ideal choice for winter.
I wanted a proper winter-bike again with full-length fenders and integrated front and rear lights. I built a beautiful Independent Fabrication a decade ago but sold it somewhere along the way, and my Open UP with an ass-saver wasn’t cutting it. I’ve tried Zwift and it’s just not for me, I’d much rather be outside. Maybe it’s my Canadian upbringing but I actually love winter riding and there have been plenty of technology improvements like tight-fitting clothing, neoprene gloves and ShakeDry jackets which improve winter riding immensely.
Full-length fenders are a winter game-changer in wet climates and are especially nice here in Wellington where it often rains overnight leading to a never-ending spray of cold water over your feet and backside, spoiling an otherwise dry ride to work.
E-bikes aren’t just my future, they’re the future of cycling
E-bikes are coming whether you like it or not. It’s no secret that road cycling is not in great shape – bike sales are down, the number of races is reduced (and that was before a pandemic ripped through the world), and many of the cyclists who propped up the sport for so many years are quitting as they’re getting older, finding the hills too steep, and the Sunday bike shop rides too long.
Additionally, road cycling technology is stale. Electric shifting promised to redefine the ergonomics of how you shift gears on your bike, and yet it sat on the sidelines for so many years. The only thing which seemed to get electric shifting to be adopted was the internal cabling on new bikes had so many tight bends that mechanical shifting barely worked. And yet if you look at the cable routing on a modern Di2-equipped carbon fibre road bike you’ll likely find the electric wires enter the frame in a similar location to where the old mechanical cables did.
Disc brakes came onto the road cycling scene somewhere around 2011 and it has taken them nearly a decade to be fitted on half the bikes out there and incite half the cycling internet arguments. The bigger, heavier e-bike needs extra stopping power so disc brakes are a requirement here, but my guess is that if you’re accepting of electric motors you’re probably not concerned about disc brakes.
Yes, the bikes of today represent a series of incremental improvements which taken individually make little difference. But when combined they have resulted in bikes which are better in every measurable way than the ones we had 20 or 30 years ago. Yet I feel road cycling has been slow to adopt and evolve and that we’re ready for a massive reshuffle. E-bikes are the next big jump in cycling technology and they arrive with the promise to go further, faster, steeper, or some combination of all three.
Making a Creo mine
Test-riding this Creo brought a smile to my face right away and I was instantly fascinated by the tech of Specialized’s own motor and software. I’ve worked with bikes for a long time and sometimes knowing too much about them is a real disadvantage as I tend to overthink rather than simply accept. However, after a few late-night spreadsheets to work out the upgrades and costs and whether it would do what I wanted, I was confident I could make it work for me.
Of the few e-road bikes on the market at the moment the Specialized Creo is the most advanced and the cleanest to look at. The lightweight motor and battery was developed for road bikes rather than simply being a detuned mountain bike motor. As a result, the whole bike is considerably lighter than the competition.
The motor and battery are cleanly integrated and the motor controller is mounted in the top tube rather than requiring a large display and extra wires on the handlebar. The geometry is based on the Diverge all-road models which feels like a good balance of attributes, especially when combined with the extra weight and speed. And the frame even has integrated yet barely visible mudguard mounts and clearance to run massive tyres.
The extra weight of fenders and lights on a winter bike will generally make it pretty sluggish and uneventful to ride. Plus, Wellington is the windiest city in the world and the prevailing northerly which funnels down my Makara Valley ride to work can be vicious, making it difficult to commit to riding when I’m tired or have sore legs. Having an electric motor changes all of this – the extra bike weight is negated and the additional 240 watts on tap balances out the 30 kph average wind around the city.
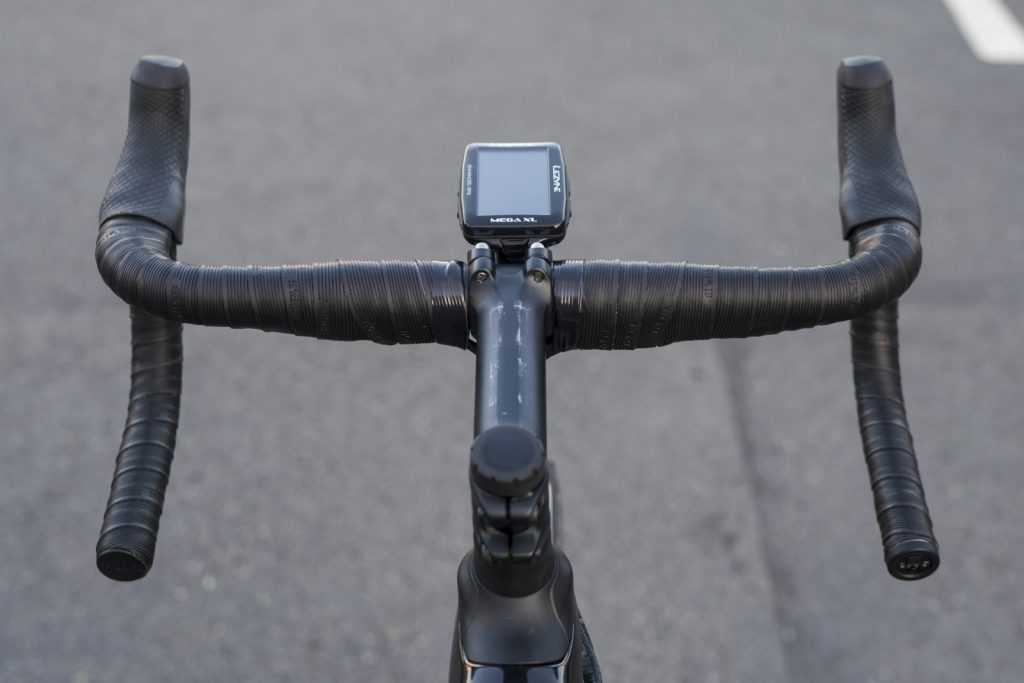
I replaced the factory-fitted Hover bar and short stem with a classic-shaped Zipp bar and a longer stem to achieve my normal road position on the bike. The Creo’s short seat tube means almost all of my FSA seatpost is exposed, which looks unsightly but is functional. The FSA seatpost was badly scratched up from being in a previous bike so I sanded it back to remove the logo and scratches and then applied a fresh clearcoat and polished to match the glossy frame and rims.
The change in stem and handlebar have transformed the bike’s appearance from a sit-up position, which would be welcomed by a newer or older cyclist, to the long and low position of someone who can comfortably touch their toes.
I chose this particular model of the Turbo Creo because it came with the excellent Shimano Di2 drivetrain. I’ve tried all the others and the tactile feel of Di2, the options for adding additional shifter locations, and the ability to reprogram the shifter buttons make it a winner.
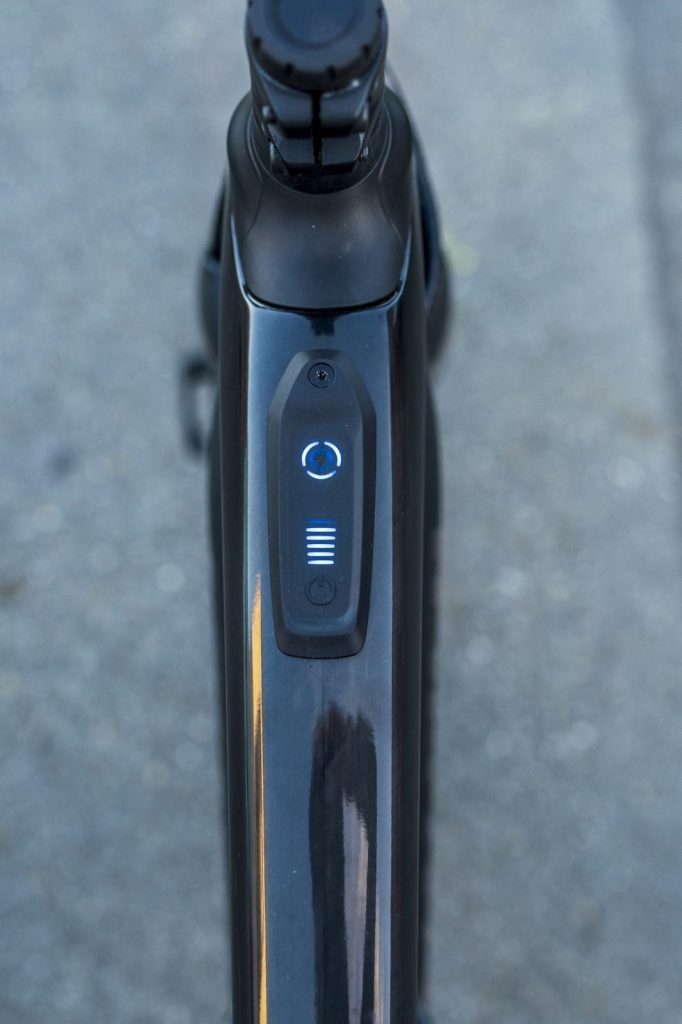
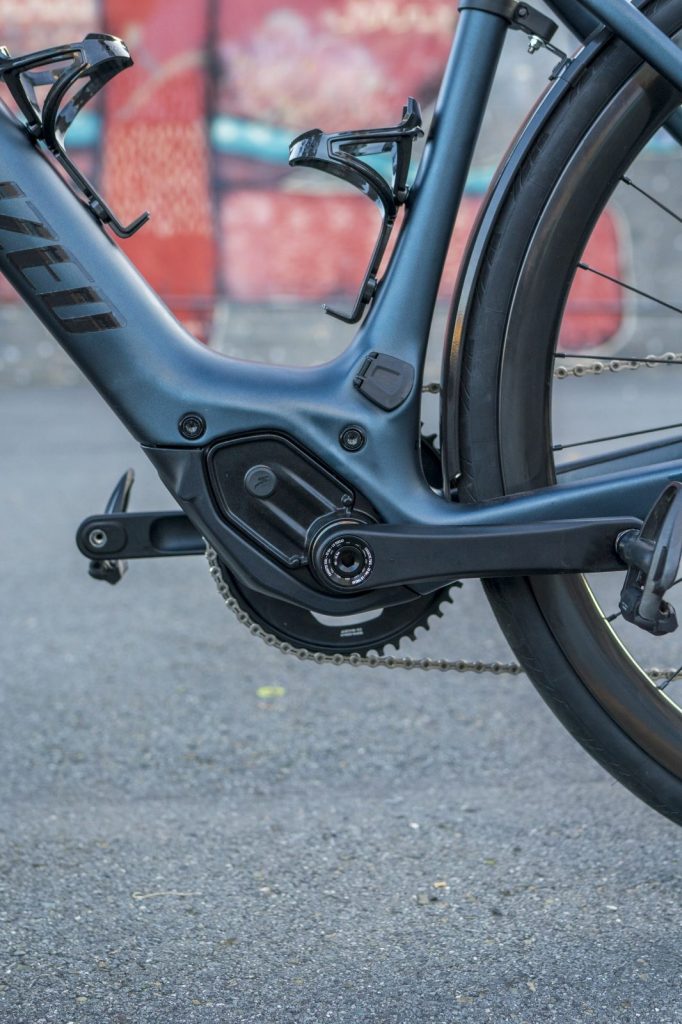
Specialized collaborated with a unnamed German-based automotive company for the Creo’s SL 1.1 motor system.
After test-riding the bike I found I wanted more lateral stiffness from the wheels and more grip from the tyres due to the heavier chassis and extra speed. I assume Specialized used its existing Roval rims and narrow tyres so that the bike looks like a familiar road bike on the shop floor but I felt it needed more confidence.
The frame uses a standard 148×12 mm Boost mountain bike rear hub but a strange 110×12 mm front axle but fortunately most modular hubs can be made to fit if you know what you’re doing. Some stiffer rims improve the bike’s mid-corner behaviour and the wider rims also allow 32 mm Continental GP5000s tubeless tyres to be installed at 60 psi.
The Creo isn’t the smoothest frame I’ve ever ridden so the extra cushion of the wide tyres is welcomed, and with 240 watts of available power there is no reason not to use a slightly slower-rolling tyre. Cornering confidence also improved dramatically and the bike’s extra weight is far more willing to change direction mid-corner now.
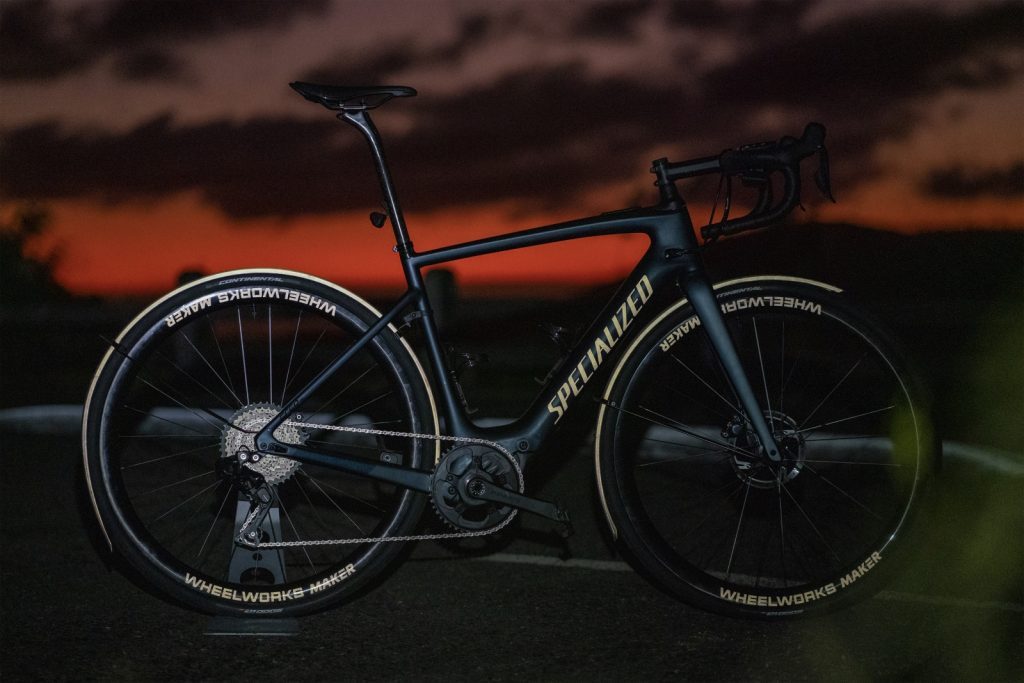
Once you’ve owned a bike with full-length mudguards it’s hard to go back. Sure, they tend to rattle and pick up the occasional stone, but their advantages easily outweigh these minor indiscretions. To add some night-time visibility for winter commutes I wrapped the fenders in 3M reflective vinyl and I also covered the frame’s downtube logo with an exact-size Specialized logo in the same vinyl. During the day the fenders and logos have a cool chameleon-like shimmer to them but at night they really pop once a car’s headlights (or camera’s flash) hit. No, I won’t be riding around dressed in black like in the photos but this was the best way to make the reflective bits pop.
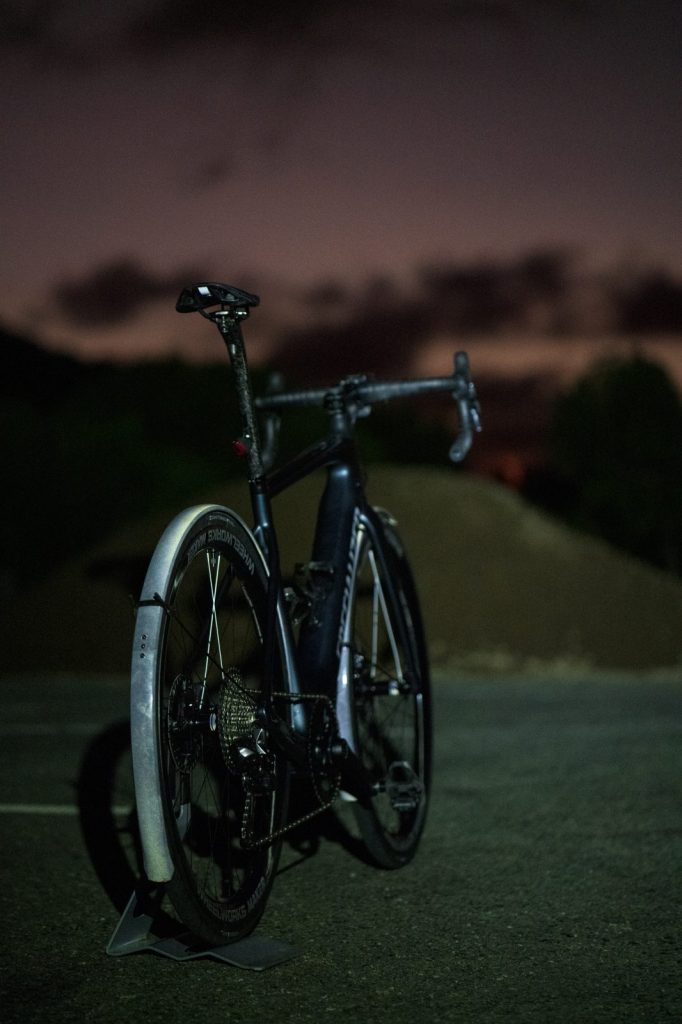
Just showing off the bike’s reflectivity.
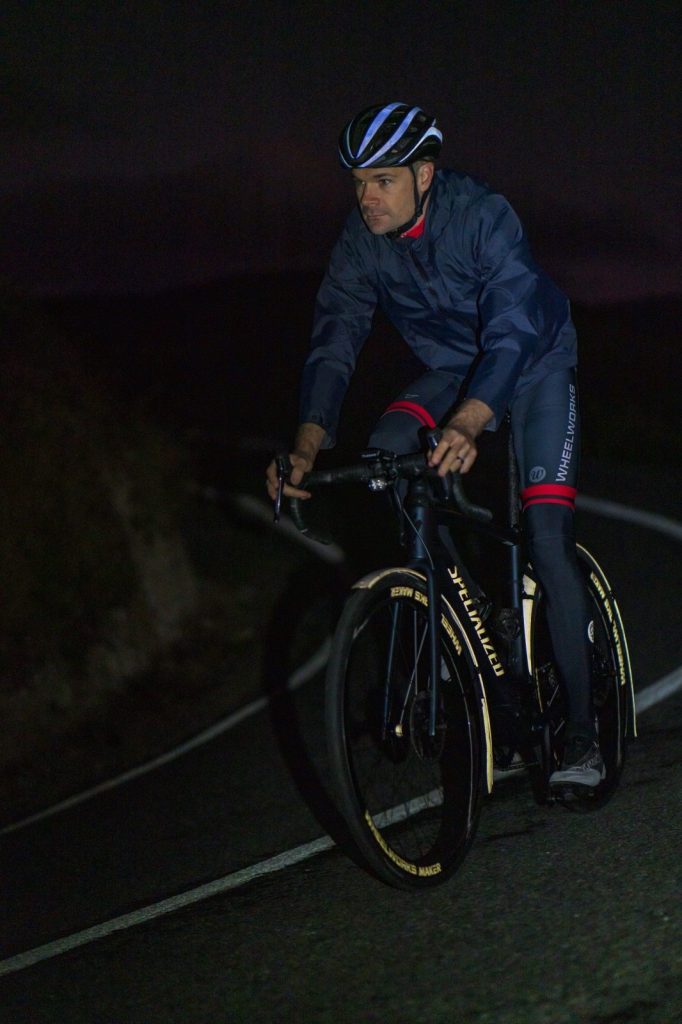
Plenty of wiring hiding within.
I’m not a fan of Di2 junction boxes being hidden away where they’re inaccessible so I replaced all the Di2 wiring so that both the battery and junction-B are housed in the top tube and single cables run outwards from there. Both are accessible by removing the Creo’s motor control unit.
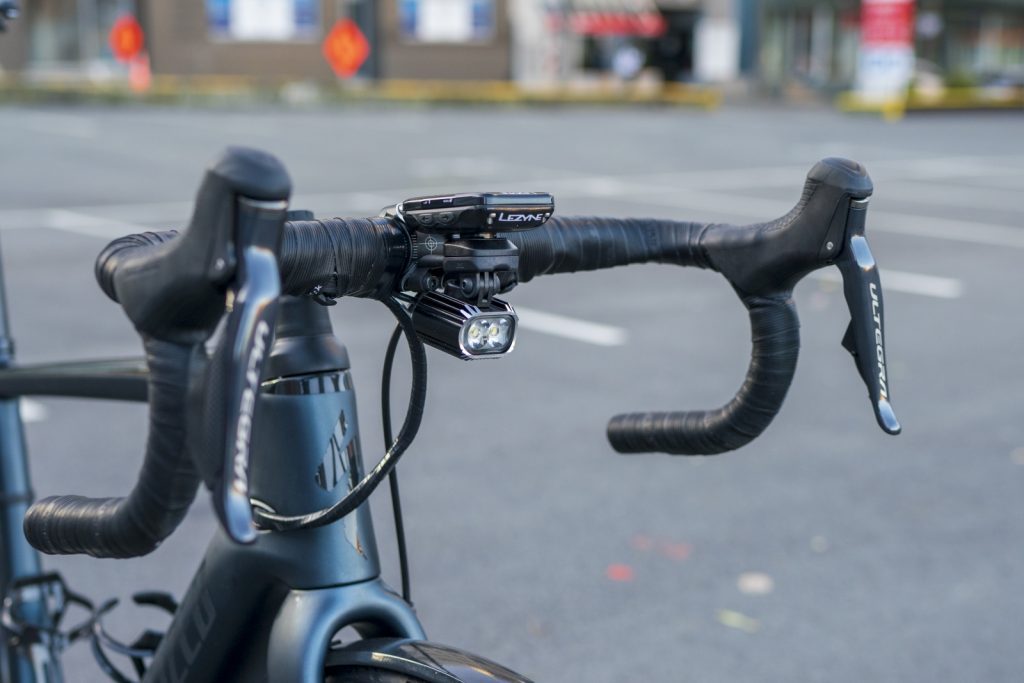
Installing the SW-R9150 climbing shifters underneath the tops of the handlebar is a real pain with Shimano’s hydraulic shifters as they only have two Di2 ports and really require either a third port on one of the shifters or on the bar-end junction-A box. I got around this by running two Di2 wires from the top tube – one to the right-hand shifter and one to the junction-A. All are heat-shrunk with the rear brake hose and the power wire for the integrated front light and hidden inside the handlebar of course.
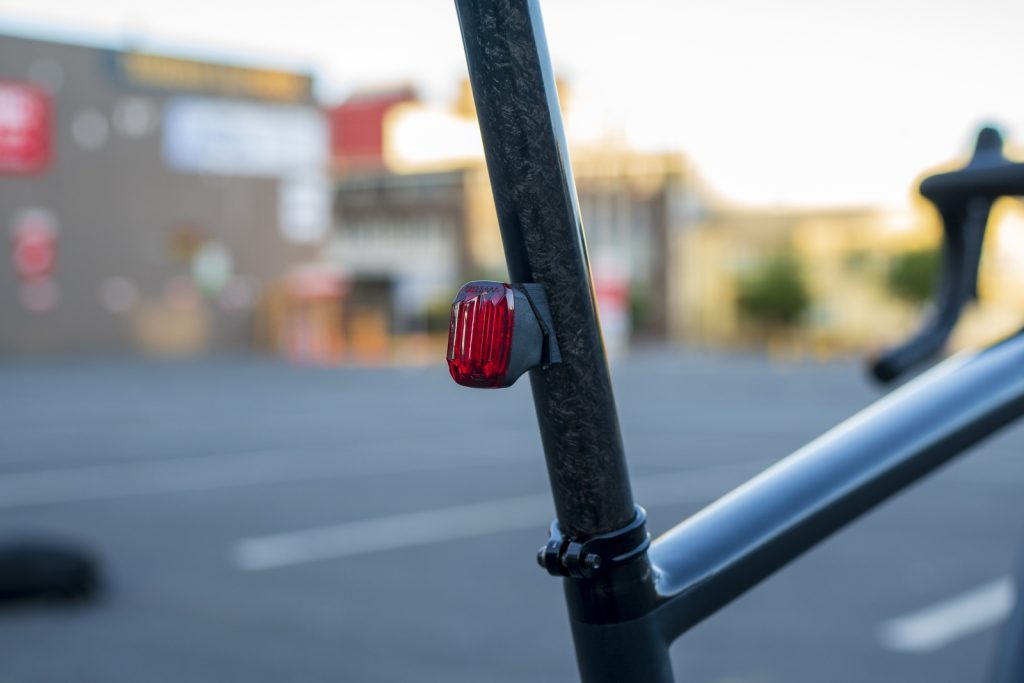
A key consideration for my winter bike was ensuring I didn’t have LED lights which needed to be charged after every ride. Nothing is more frustrating than arriving home dripping wet and fumbling with rubber bands to remove two lights and then have them sit next to my laptop all evening charging. Instead, I wanted to power the lights with the e-bike’s battery. Lezyne’s e-bike lights were the tidiest option with a tiny rear light designed to be mounted on a fender, and a matching, two-LED front light capable of kicking out 1,000 lumens.
Clean.
I was reluctant to mount the rear light to the fender in case I wanted to remove them for summer riding or fitting a second set of 650b wheels so instead I designed and made a 3D-printed bracket which is bonded to the seatpost and I’ve run the power wire inside the post. There is no visible wire powering the rear light, and the front light has only a 30 mm section of exposed wire before it ducks under the handlebar tape to be fully hidden.
The front light is held in place by Lezyne’s X-mount system which is a very tidy way of combining the light and GPS into one unit. I was unable to find a tidy way of powering the GPS unit from the bike’s battery so instead chose the Mega XL GPS because of its 42-hour battery life, although the unit is much bigger than I’d anticipated and so it might be swapped out for a smaller model in the future.
A fun project, and some matching kicks
I run a business building high-end wheels and repairing carbon frames, and from a business owner’s point of view it’s fun to do project bikes like this and it’s a great way for our team to learn new skills. We’re familiar with applying vinyl graphics to our wheels but wrapping the fenders and re-doing the Specialized logos in reflective vinyl was new. Stretching that vinyl over the complex curve of the fenders gave our team a new appreciation for vinyl-wrapped cars and made us rethink what’s possible for decals on our wheels.
The reflective details on the fenders proved mighty tricky.
The wide Q-factor of the motor necessitated a pair of dedicated shoes for this bike and our carbon repair technician Cameron copied the custom carbon fibre orthotics in my race shoes using a new vacuum resin technique that he doesn’t use in frame repairs. It took a few attempts but the final result is a perfect carbon fibre insole. Cameron also did the bulk of the finishing work to make my 10-year-old seatpost look better than new.
I built this bike for my daily commutes and so it’s with a strong sense of irony that I write this in quarantine — New Zealand went into lockdown only a few weeks after finishing this bike. That said, I’ve had enough time on it to enjoy the bike, learn what it’s good at, and see its shortcomings. And now I’m itching for lockdown to be lifted so I can learn more about my new friend.
Electric shifting causes controversy and disc brakes ignite nearly religious debate so having both sit alongside an electric motor is a lightning rod for both vitriol and curiosity in equal measure. What is undeniable though is that every friend who has ridden this bike comes back with a smile on their face. Isn’t that what cycling is all about?
Spec
Frameset: Specialized Turbo Creo, logos replaced with black 3M reflective vinyl
Fork: Futureshock 2.0
Motor: Specialized SL 1.1 240 watts max power
Battery: Specialized SL1-320, fully integrated, 320Wh
Rims: Wheelworks Maker OG – Offroad Gravel carbon. 35 mm deep, 22 mm internal, hooked bead
Hubs: DT Swiss 350s 110×12 mm / 148×12 mm
Spokes: DT Swiss Aerolite
Tyres: Continental GP5000s 32 mm tubeless
Handlebar: Zipp SL88 40 cm
Bartape: Fizik 2 mm
Stem: Pro PLT 130 mm -10º
Seatpost: FSA, logos removed, clear-coated, polished
Saddle: Pro Stealth
Fenders: Specialized wrapped in black 3M reflective vinyl
Front light: Lezyne Macrodrive 1000, powered by the bike’s battery, all wiring internal
Rear light: Lezyne fender STVZO with custom 3D printed mount, powered by the bikes battery, all wiring internal with quick-connect in seatpost
GPS: Lezyne Mega XL GPS with X-Lock mount
Shifters: Shimano Ultegra R8070 Di2
Remote shifters: Shimano SW-R9150
Brakes: Shimano Ultegra R8070
Brake rotors: Shimano DuraACe R9100
Rear derailleur: Shimano XT Di2
Cassette: Shimano XT 11-42
Chainring: Praxxis 46t
Crankarms: Praxxis 175mm
Pedals: Shimano DuraAce 9100
Bottle cages: Tacx
