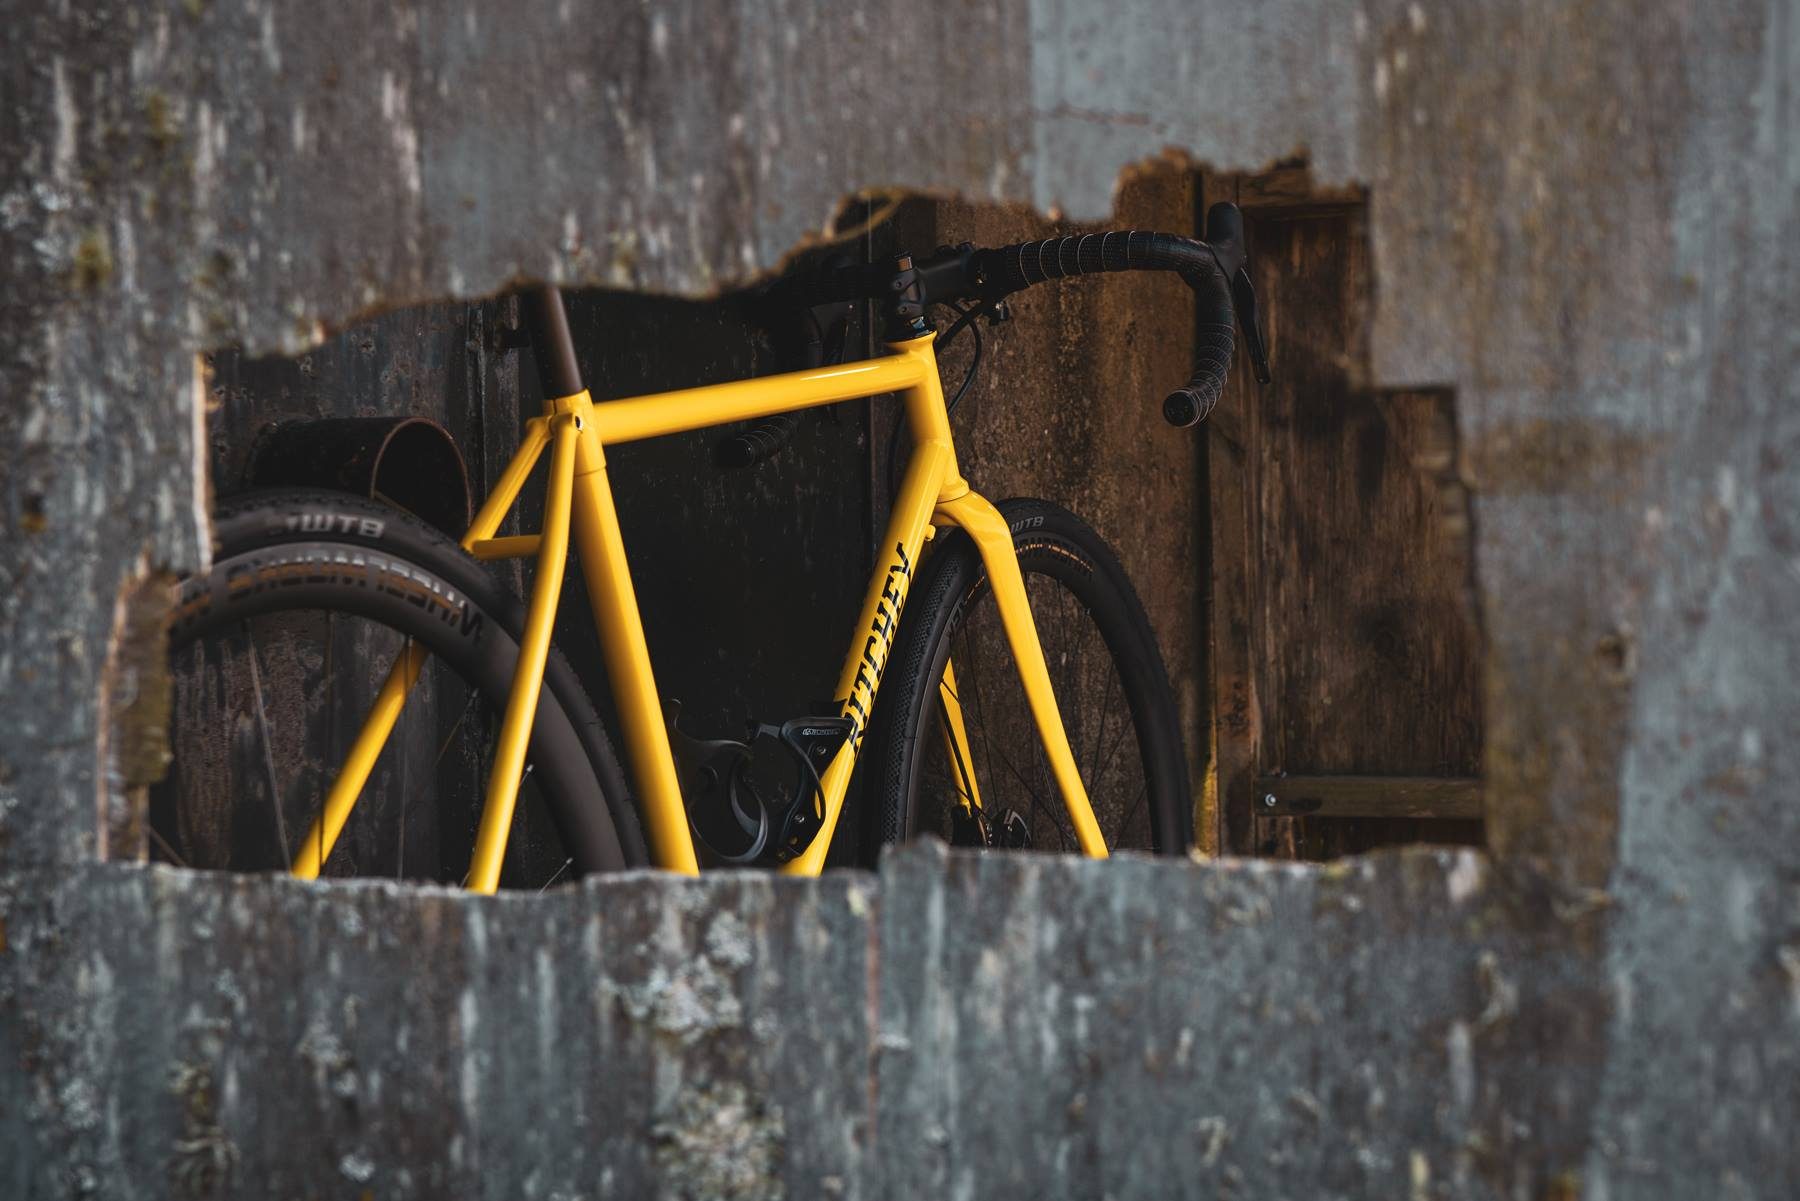
More on that yellow Ritchey Gravel Bike
| Last week we shared some photos of a bright yellow Ritchey Outback on Instagram and our newsletter and I’ve had a lot of questions and comments on the bike so I thought I’d go into more detail about it. The bike belongs to Brent Backhouse – a graphic designer who does work for Rocket Espresso and Eleven, and whom does some work for us at Wheelworks. Brent is a staple of the Wellington cycling scene and undoubtedly one of the most stylish gents you’ve ever seen on a bike. |
| He’d been making noises about a gravel bike for a while and the limited edition Ritchey Outback in yellow caught his eye, however with the yellow sold-out and wanting to run a Di2 grouspet it wasn’t going to work. Between running Wheelworks, Alpha Carbon Repair (more on that later) and my own life I don’t have much time to work on bikes these days but it’s something that I love and miss. When opportunities like this one come up where I can do unique things, push the boundaries, and work with clients where “good enough” isn’t then I find it hard to say no 🙂 On the surface this looks like an easy build: simply a Di2 groupset on a yellow frame, however the closer you look the more you realise how much thought and effort went into it. |
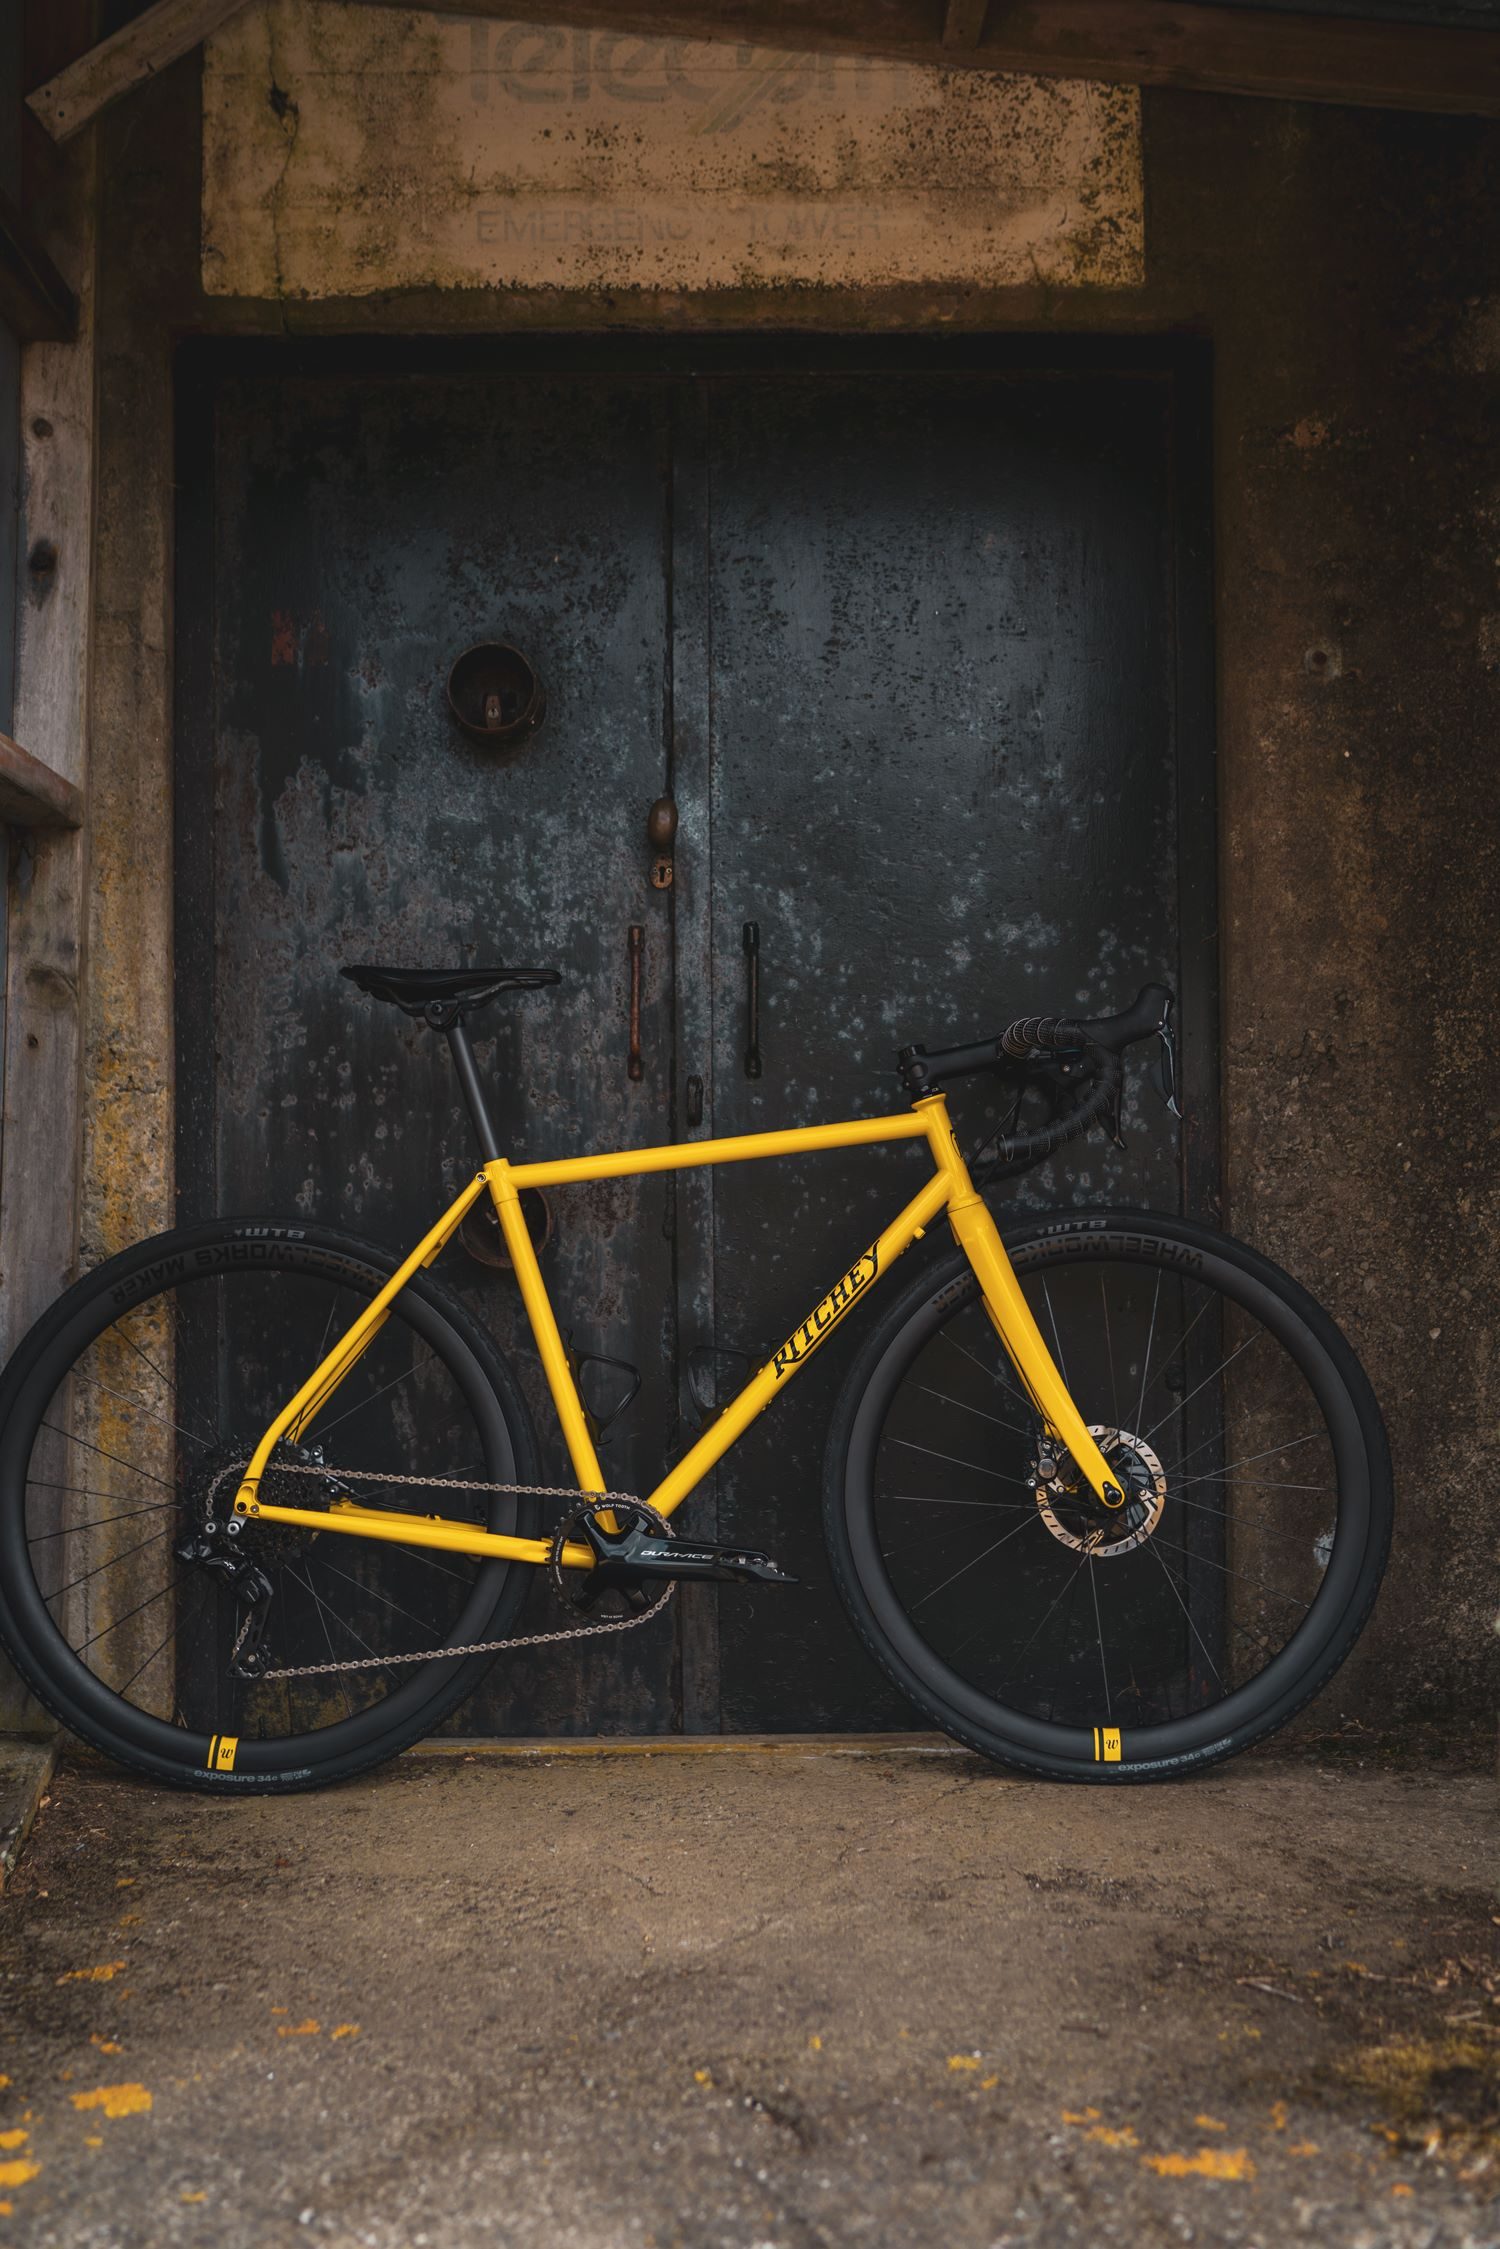
| Let’s start with the frame. As I mentioned the limited edition yellow was sold-out, and wanting to run a clean Di2 installation made things tricky. I’d run a super clean Di2 install on my own Ritchey Swiss Cross which shares a similar set of tubes however the hooded quick-release dropouts of the Swiss Cross allowed for a sneaky Di2 exit port, something the thru-axles on the Outback don’t. Framebuilder, Campagnolo aficionado, and all-around GC David Benson came to the rescue and brazed a cable port into the driveside chainstay and removed all of the rear derailleur cable stops. Ritchey frames are generally well thought-out with lots of attention to detail but their cable routing is terrible and even if running a mechanical groupset the top-tube cable routing and sectioned housing are a stupid idea (unless you like catching your knees and delicate bits on bits of steel protruding from the frame.) Brent and I opted to leave the single, well-placed front derailleur cable stop incase a 2x mechanical groupset was to be fitted in the future. With the frame ready for Di2 we sent it to Brendon Sharrett , another stalwart of the cycling world who has competed at top level XC mountain biking, cyclocross, and road cycling over the years. His paint company Velo Creations is the best in the country and Brent and myself had seen enough of his work to know he would do an excellent job of laying down a beautiful, clean yellow. |
| With the frame back from paint it was time to build it up. Fitting Di2 wiring to a frame not designed for it is an art and requires plenty of patience as you try to fish wires through places they were never designed to go. The hardest part on this Swiss Cross was the rear brake cable and Di2 wiring loom: To keep the lines clean I heat-shrunk the Di2 wire to the rear brake line for it’s journey along the downtube, then snuck the Di2 wire into the bottom bracket shell. The junction-B is in the seattube and it feeds the rear derailleur and seatpost mounted battery. With no access for the junction-B all the cable and brake hose lengths needed to be well planned so the entire loom could be fitted in reverse order and via the seattube. Yes, we could have used SRAM’s new AXS wireless groupset which was announced after all the frame modifications but before the final build, but by this point we were committed to Shimano’s proven and durable offerings. |
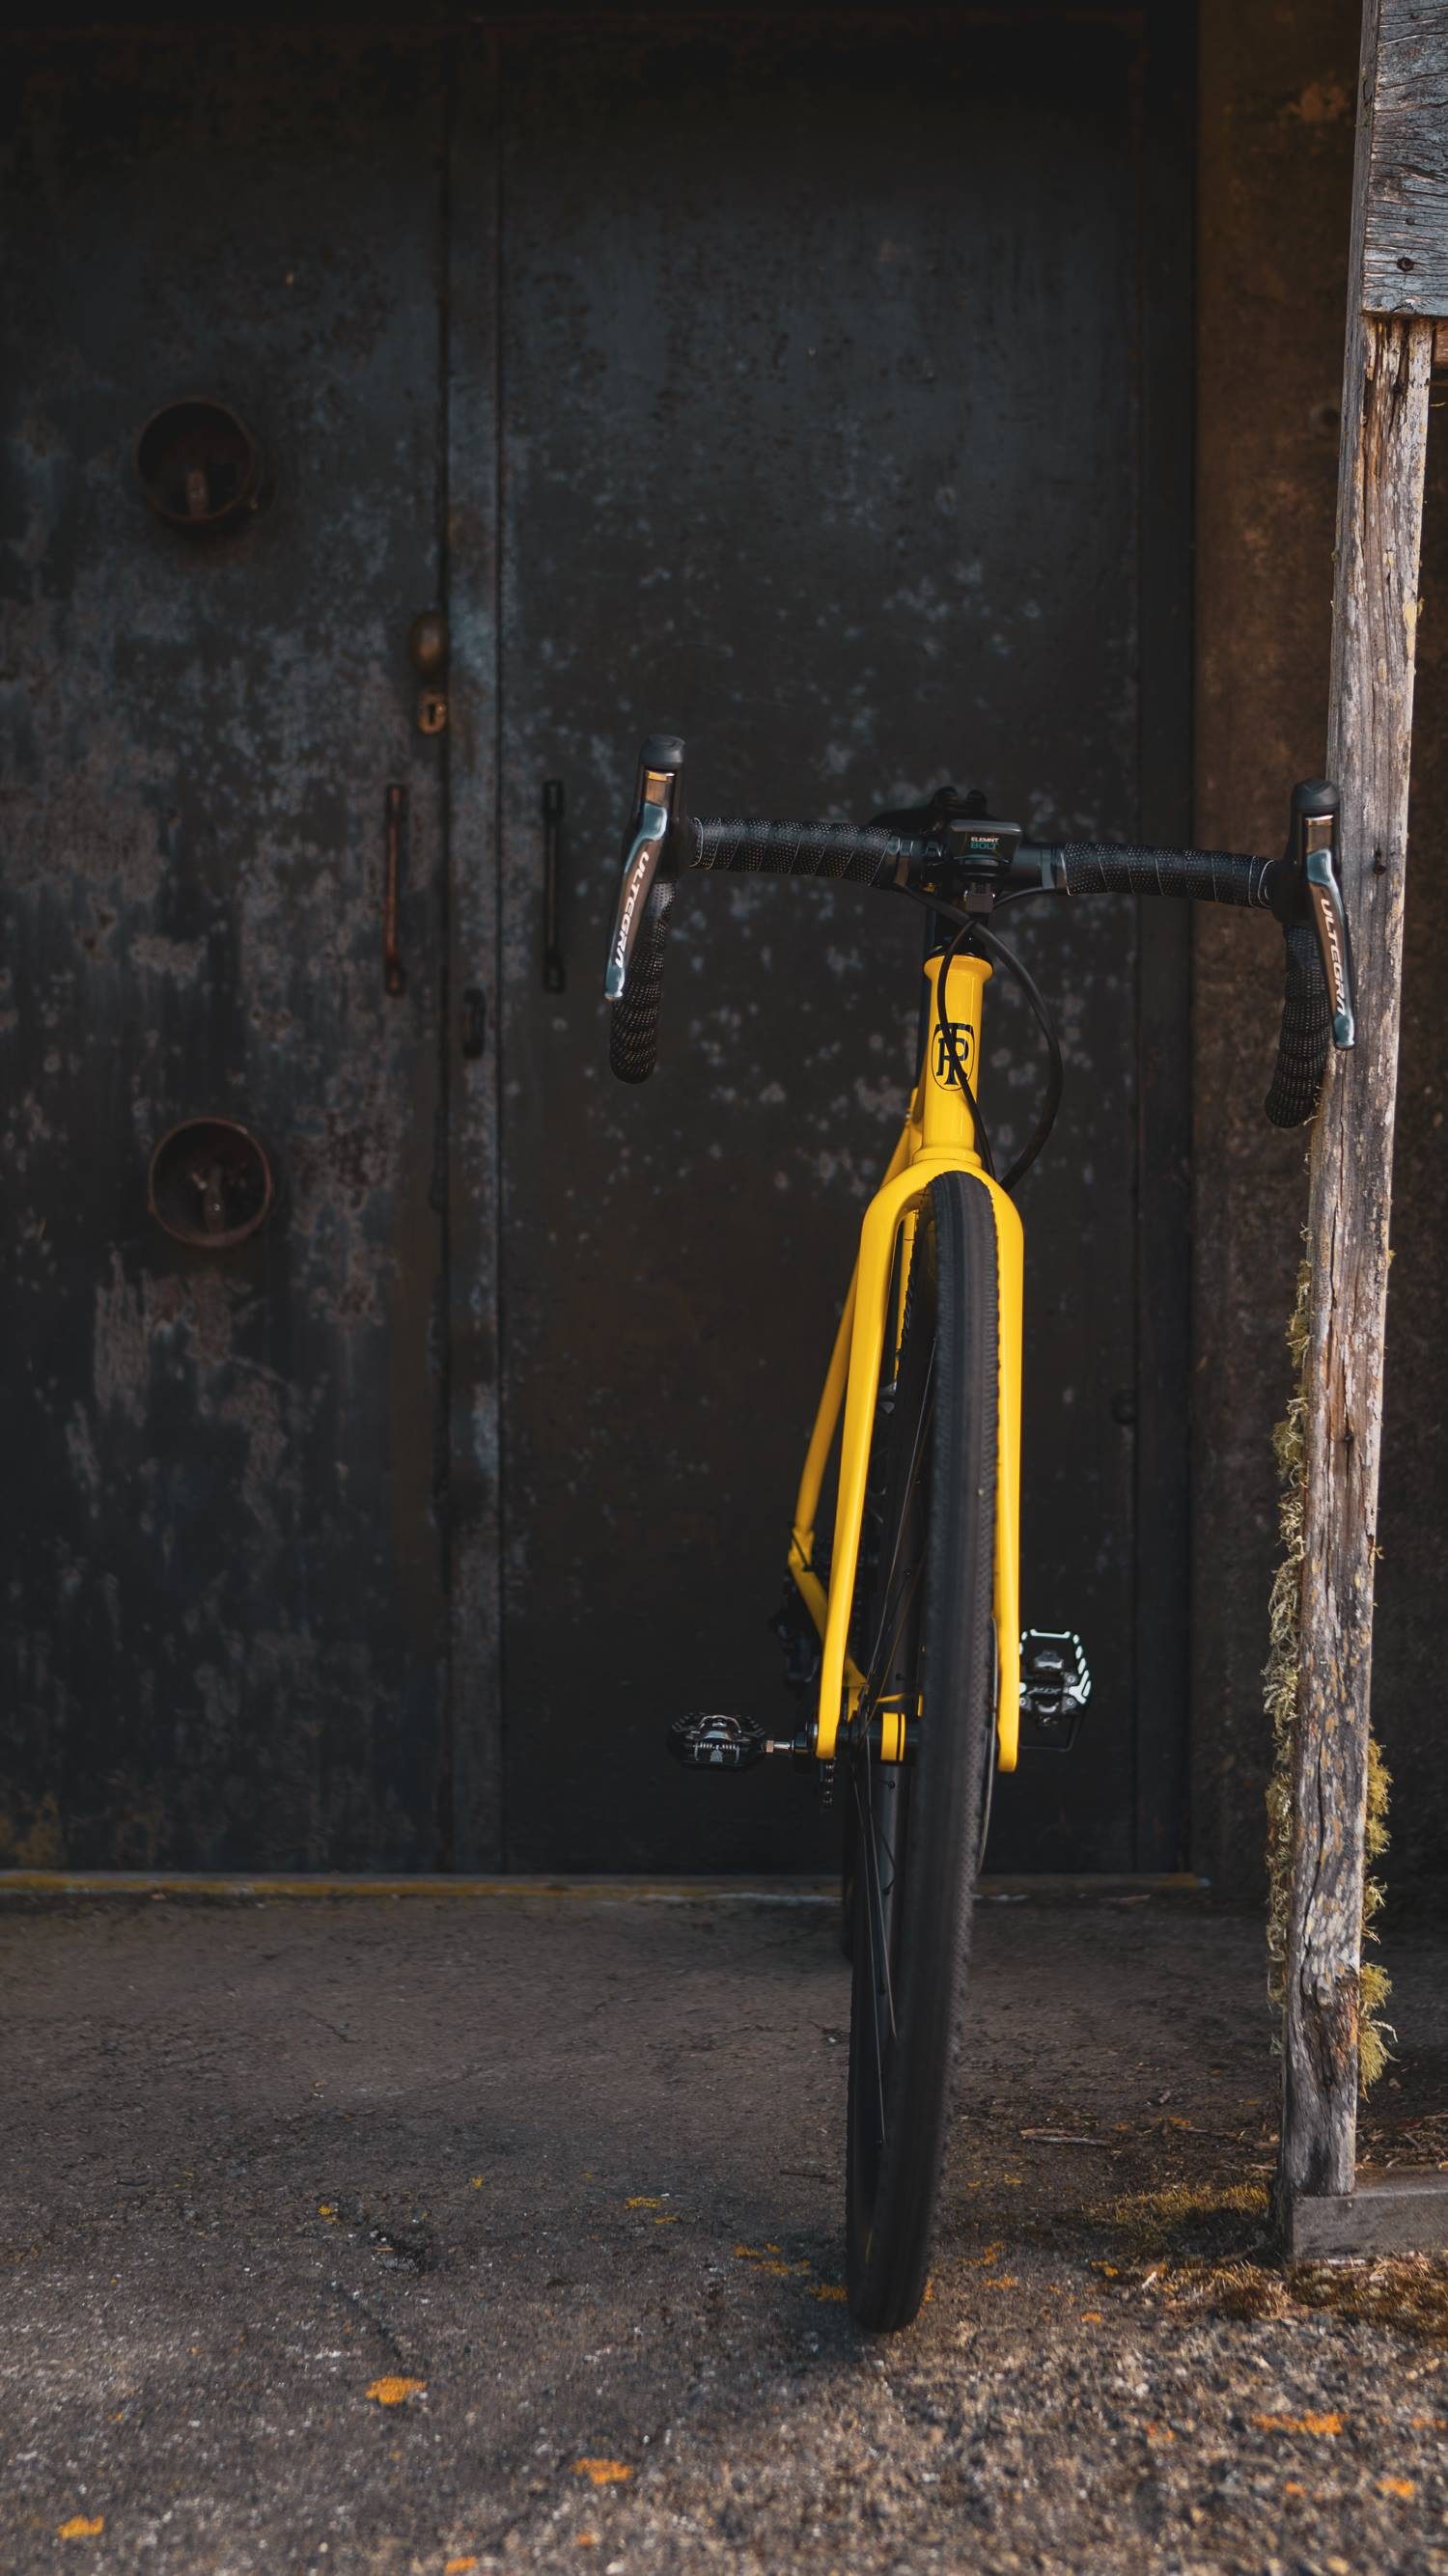
| Brent wanted the front of the bike to emulate his Cannondale road bike so we used the same 3T stem and alloy handlebar. To have a clean Di2 install and use Shimano’s bar-end junction box I drilled a couple of holes in the drops of the bar to run cables between the shifters. The keys here are to de-burr the holes really well to prevent damage to the cables and to be extremely careful about where the cables are positioned on the outside of the handlebar as you will feel them under the Fizik bar tape and if positioned correctly they make a lovely pistol-grip shape for the bar. The 3T stem looks good but the reverse bolts make it difficult to work with. It wouldn’t be my first choice for a stem, but it does look clean. All the logos and reference marks were carefully removed from the headset, stem and handlebar to give that full black, clean look. The only thing I left was the World Champion stripes on the headset top cap. It was Thomas Frischknecht who earned those stripes in case you were wondering and this interview with Tom Ritchey has some interesting insights into that part of the companies history. The 3T seatpost is also overly fiddly to install but hopefully it’s single-bolt head will provide enough bite to stop the seat from rotating while offroad. The Di2 battery is held inside the seatpost shaft with a Ritchey battery holder. |
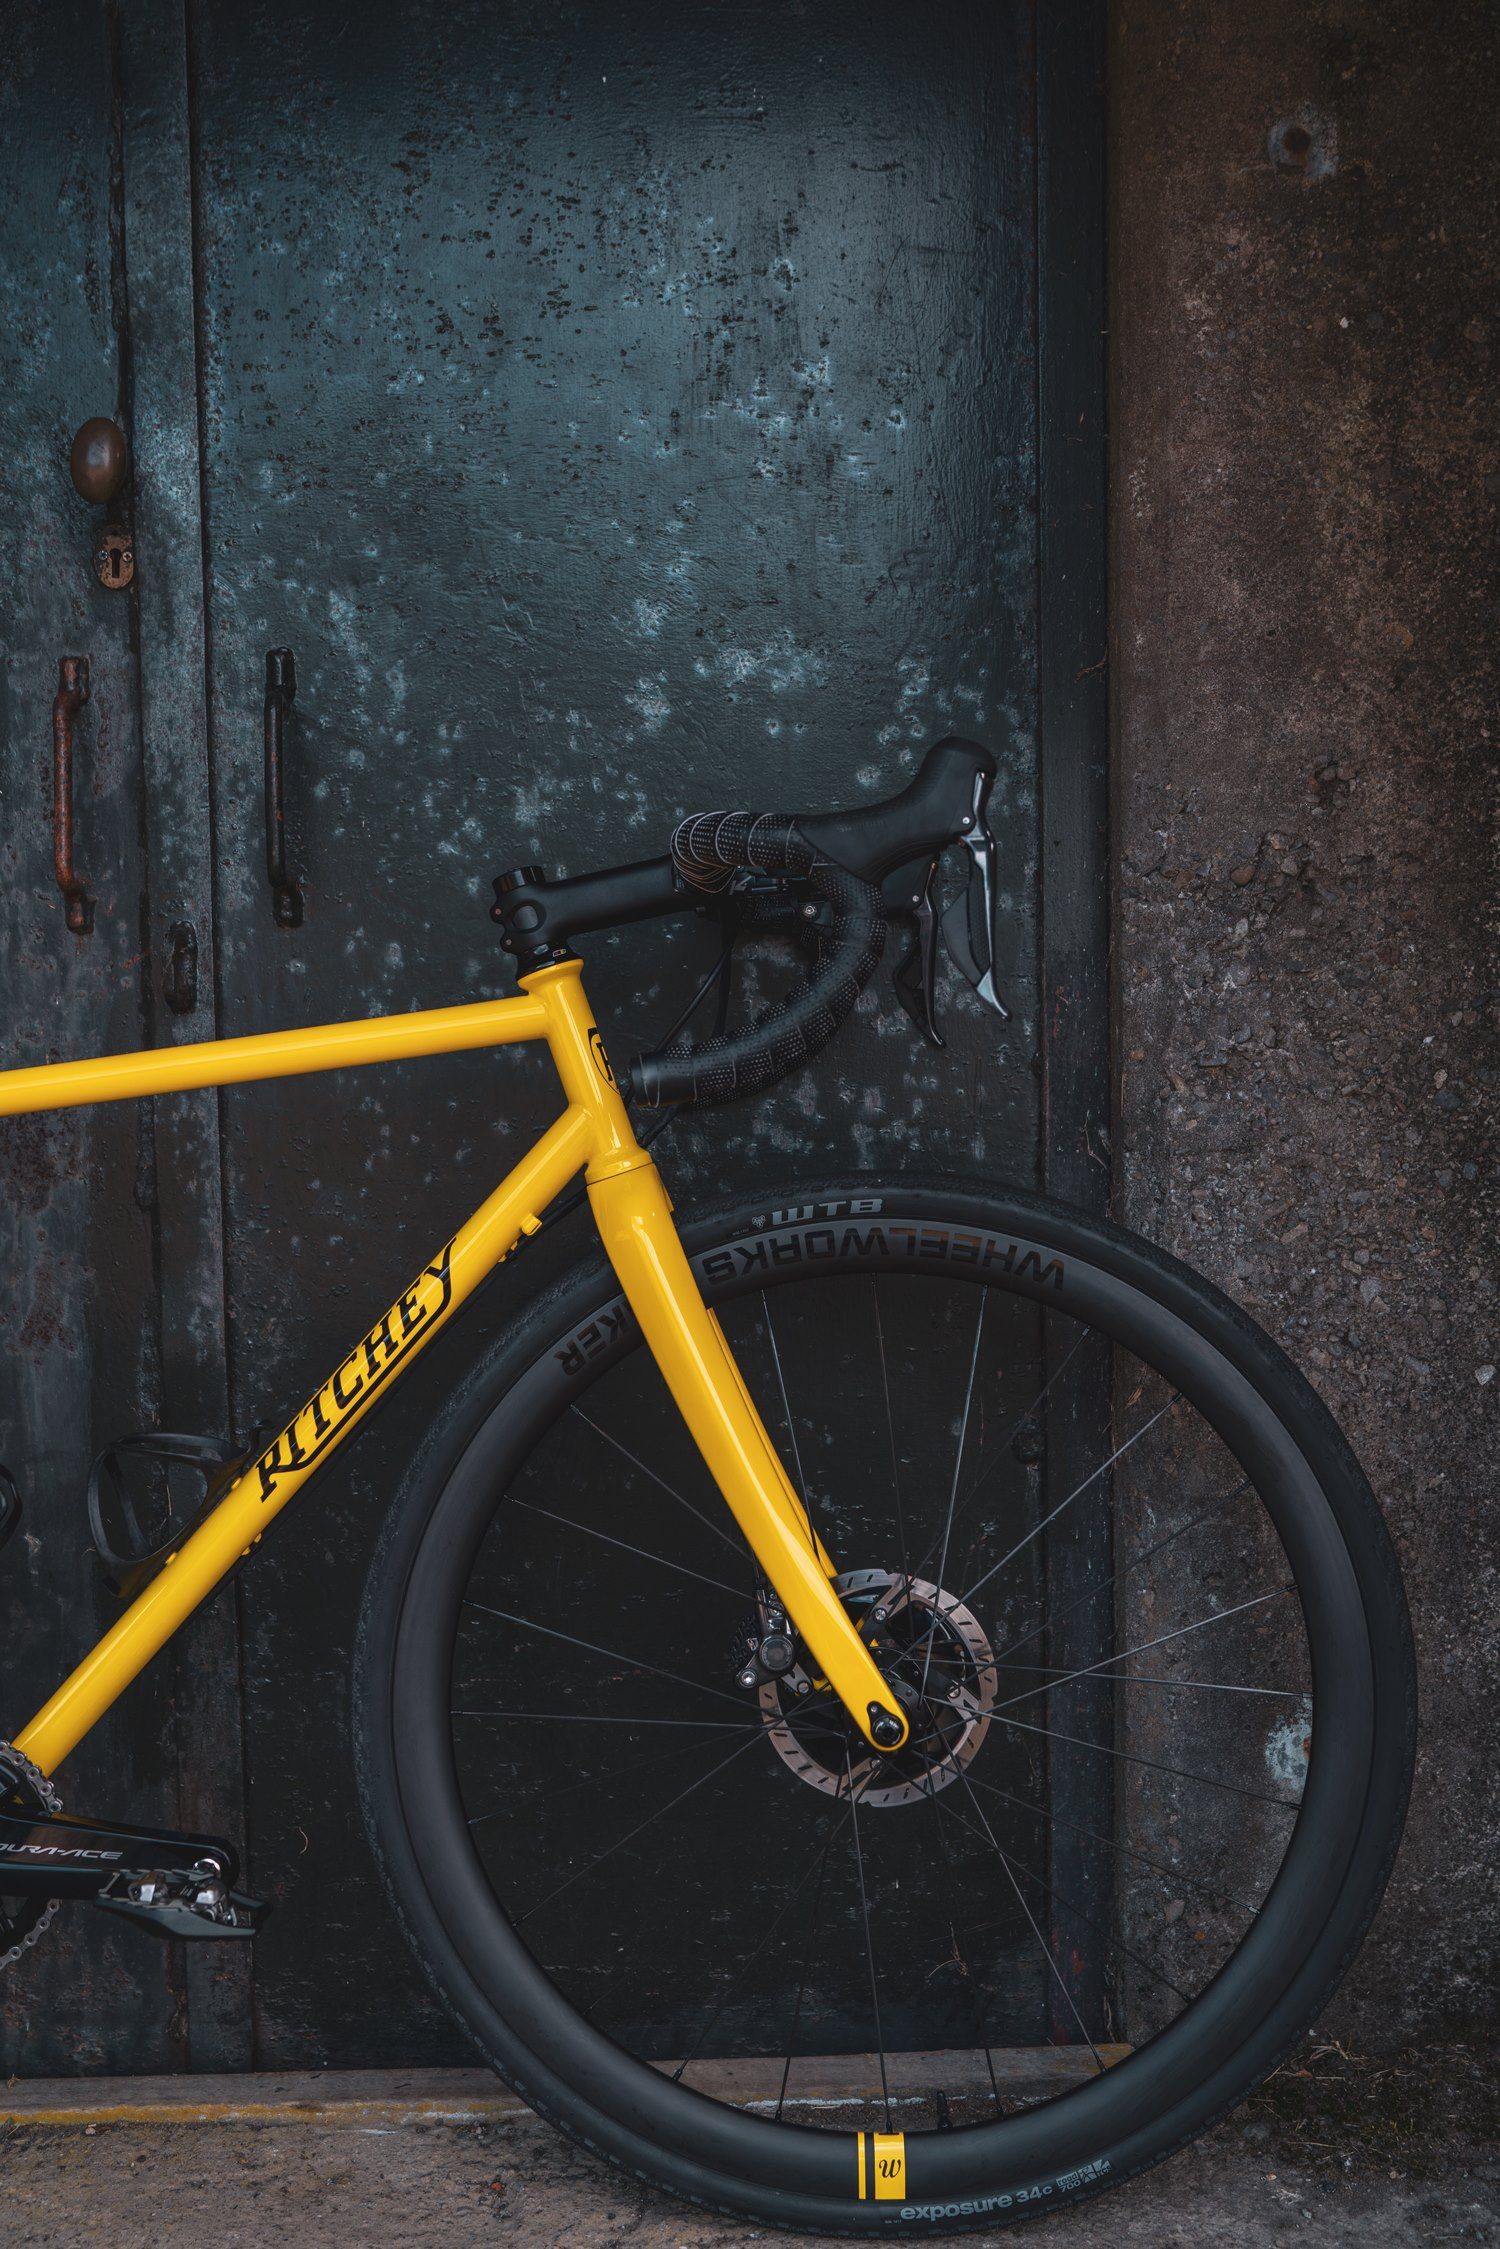
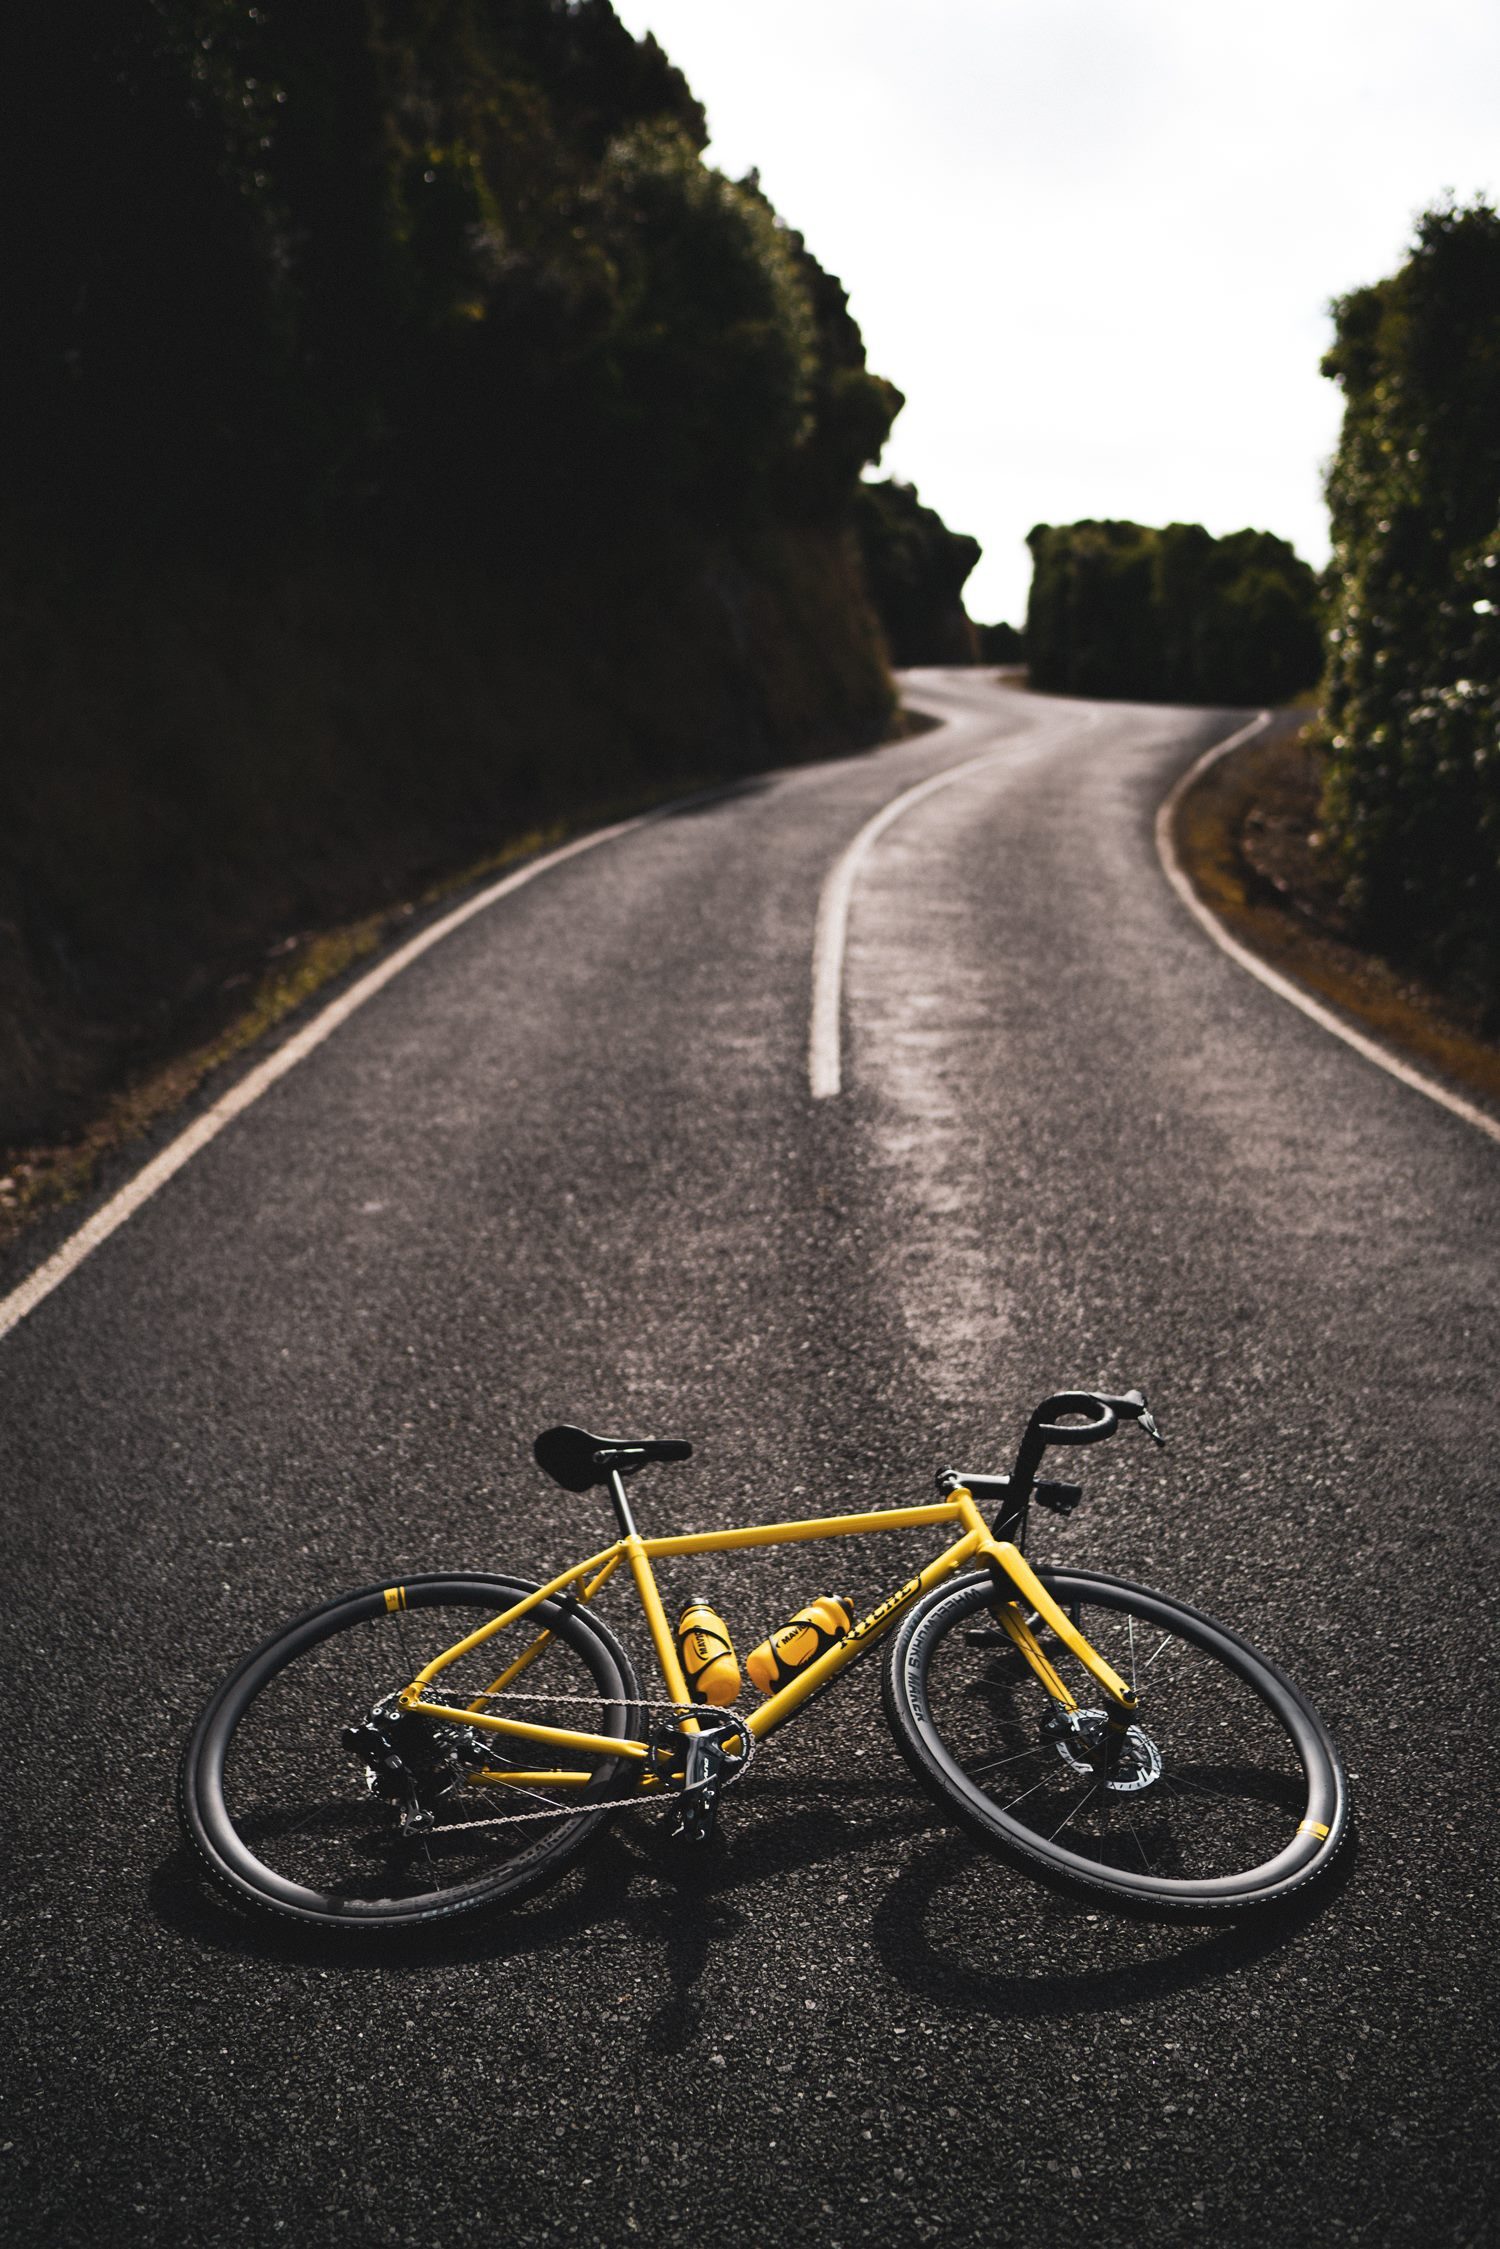
| Gavin built up a pair of Dial hubs and Maker AR rims with some black and yellow decals to match the clean frame. The Dial hub was chosen because of it’s clean looks, ability to use the 12mm thru-axles of the Ritchey, and the fast engagement XD freehub body. The Maker AR is by far our most popular disc-brake rim due to its versatility. We use the exact same rim (but often in a different spoke count) for go-fast road bikes as we do for gravel and CX bikes. The 23mm tubeless-ready bead-width is perfect both modern road or gravel tyres, and we’ve used a hooked bead to ensure safety and compatibility with a wide range of tubeless and regular tyres from 25mm to full blown mountain bike size. At 1450 grams this pair of 35mm wheels is lighter than most “climbing specific” wheelsets but with unparalleled durability. |
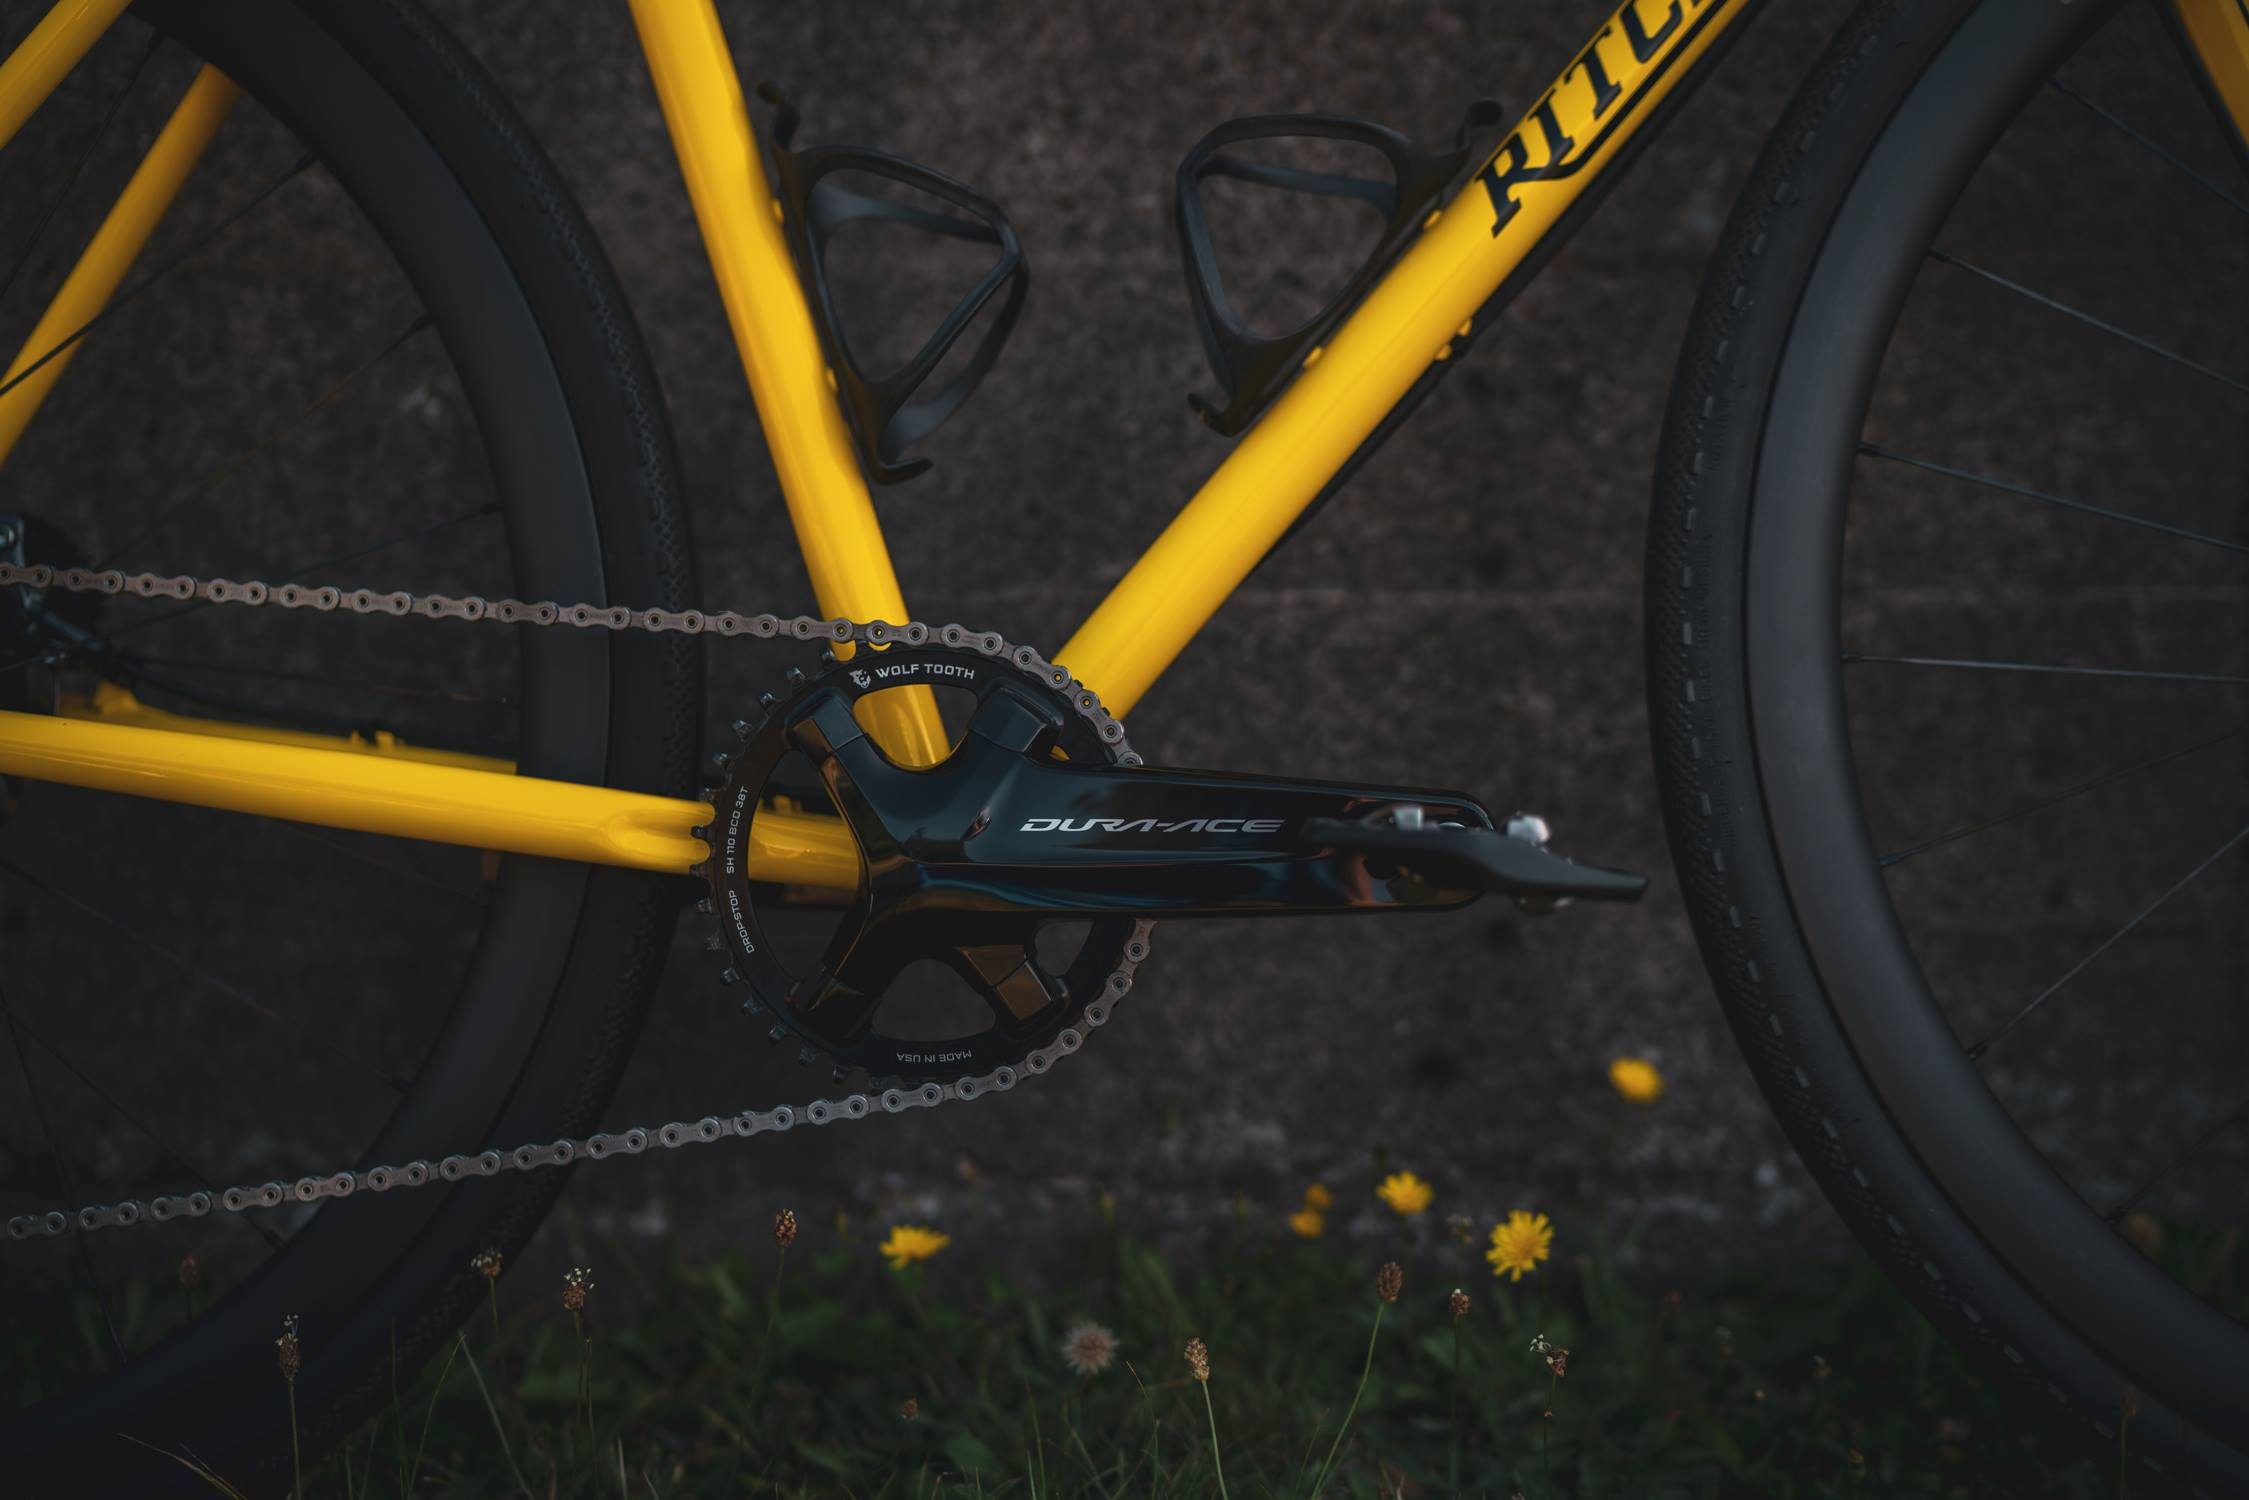
| Brent is new to gravel and will likely use this bike for a lot of paved and unpaved commuting so I suggested the WTB Exposure tyres in 34mm width. These have a solid center for fast road riding and enough shoulder knobs to provide good traction off-road this time of year. Brent has Shimano drivetrains on his other road bikes and so wanted to stick with Shimano for this one. We use the Ultegra Di2 shifters because they appear to be identical to DuraAce (except the titanium band clamp) and cost about half the price, and matched them to R785 brake callipers and 160mm DuraAce rotors. For rear shifting we paired a Sram 10-42 cassette with a Shimano XT derailleur. The Sram 1180 cassette is 122g lighter than an XT cassette with the same range, plus is fully black. Since both companies use the same cassette spacing the shifting is perfect. The XT derailleur was chosen for its ability to use a wide range cassette and it’s clutch meaning no chain chatter. DuraAce cranks and a Wolf Tooth 38t chainring round things out. I managed to get a set of supermega limited edition chainring bolt covers which are PRO-issue only for Shimano sponsored cyclocross racers. With a small amount of modification they work with the 1x chainring to give a really clean transition between the DuraAce crankset and the chainring. XTR platform pedals were chosen so Brent can ride the bike to work or around the park with his daughter without needing cycling shoes. |
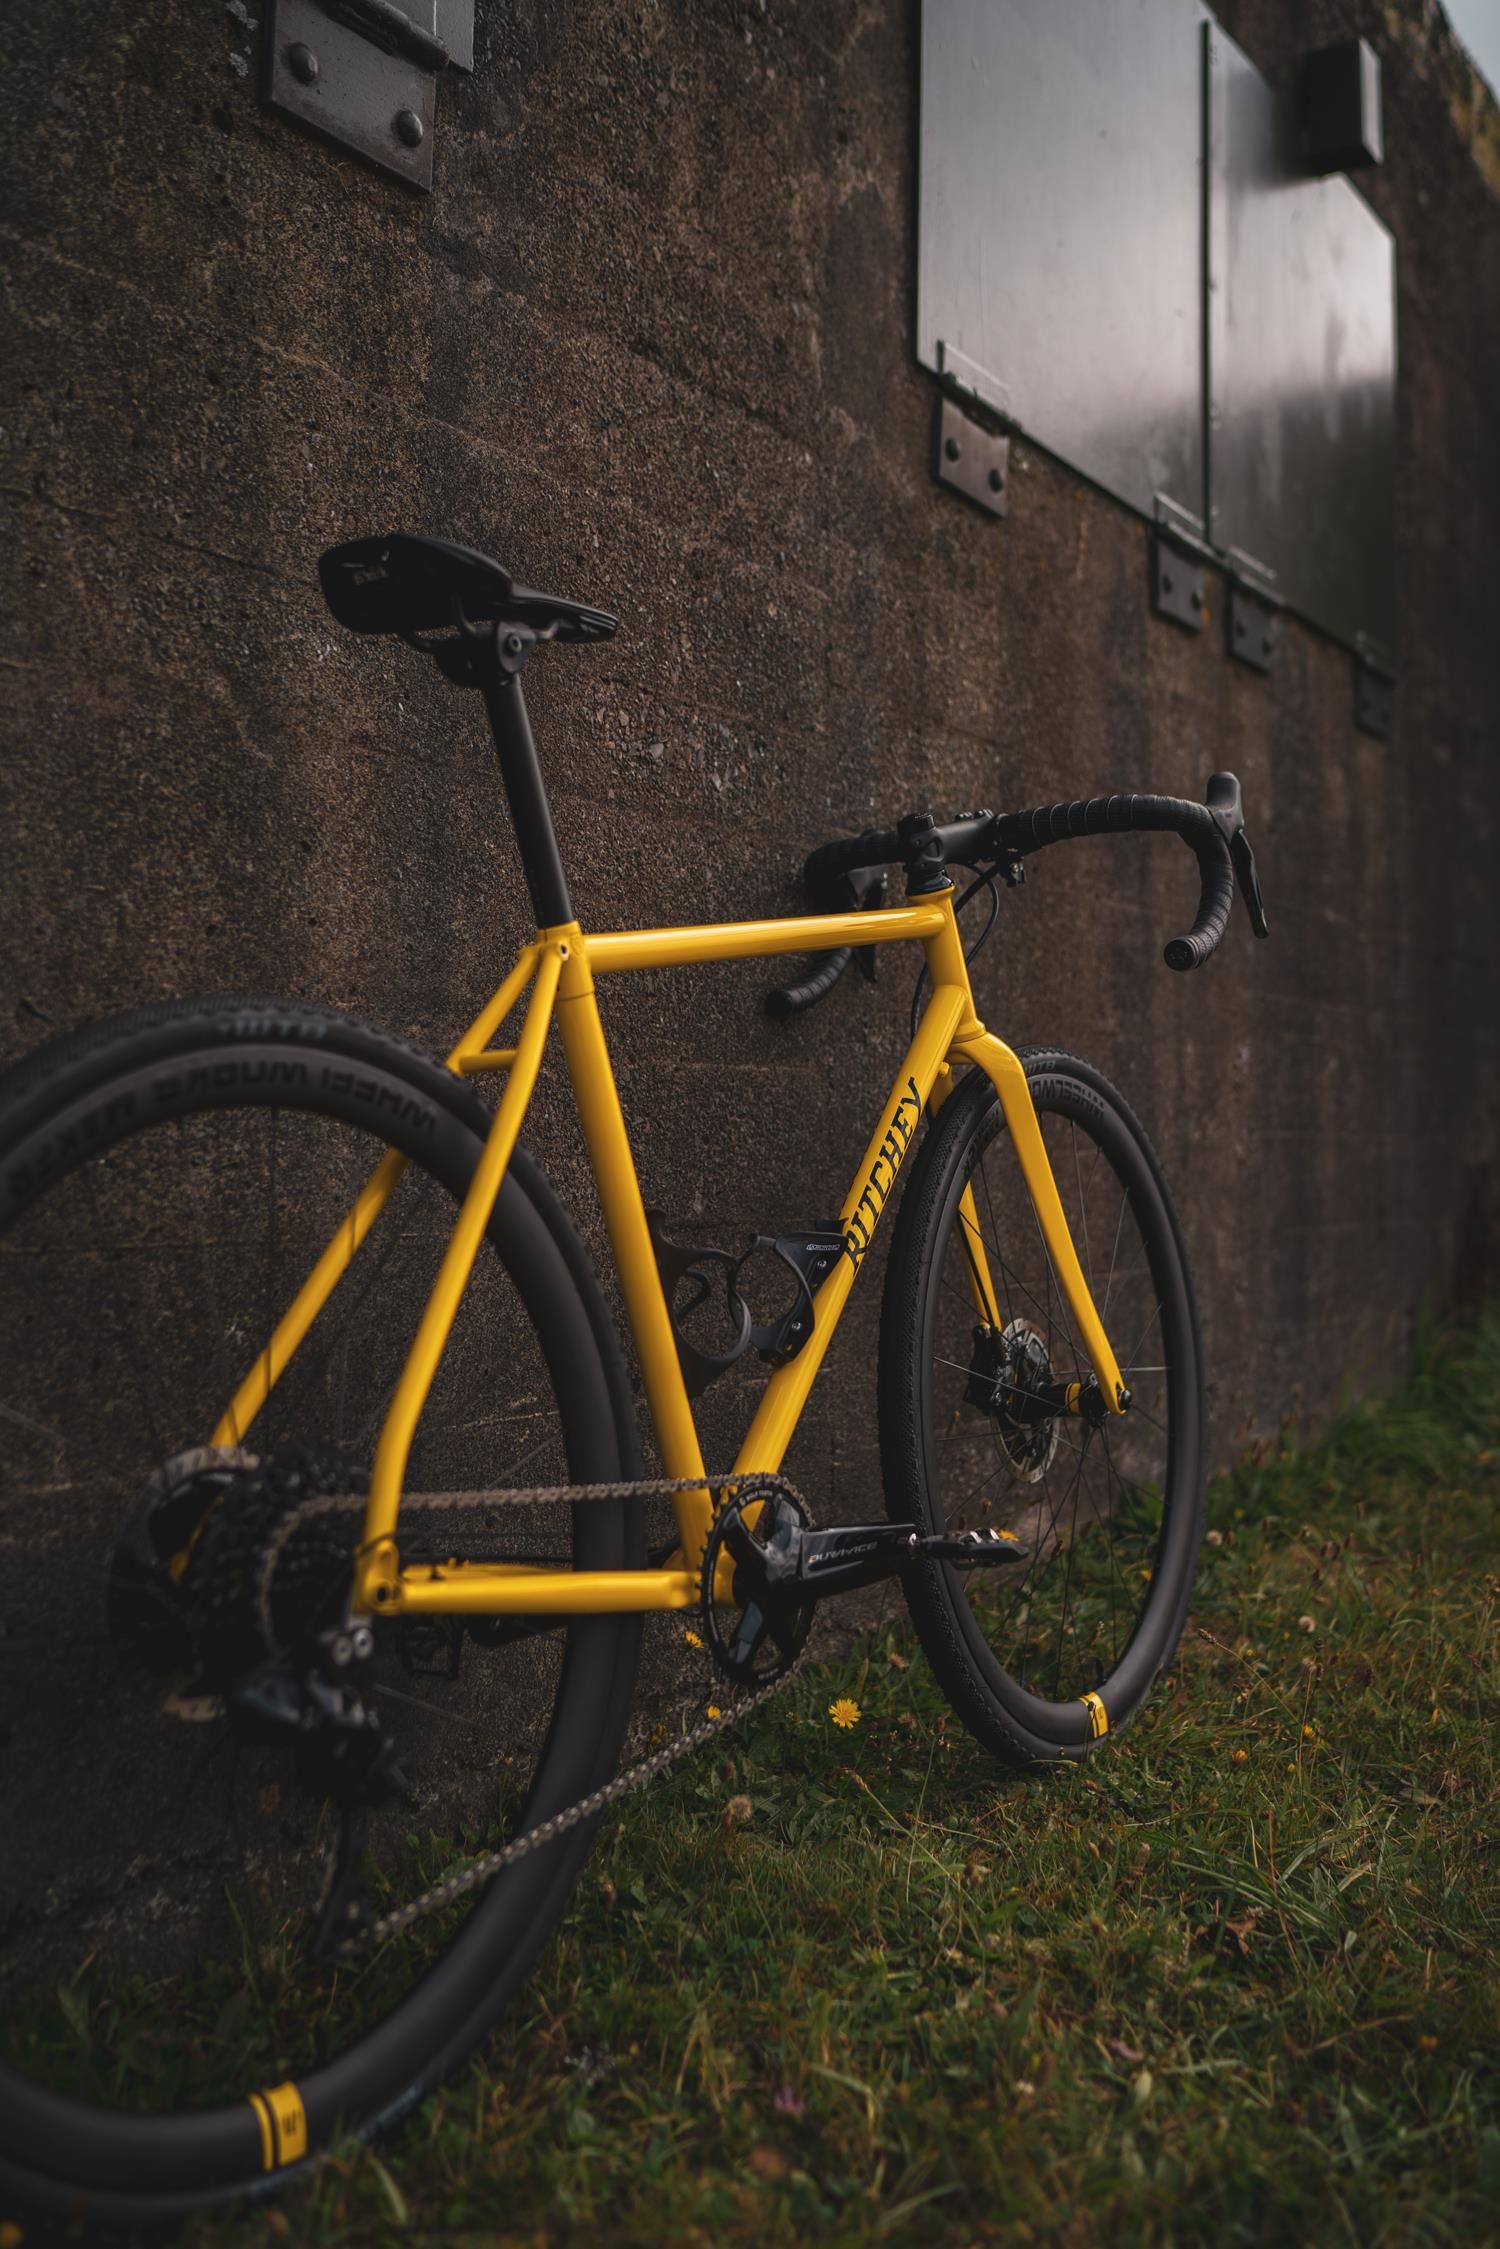
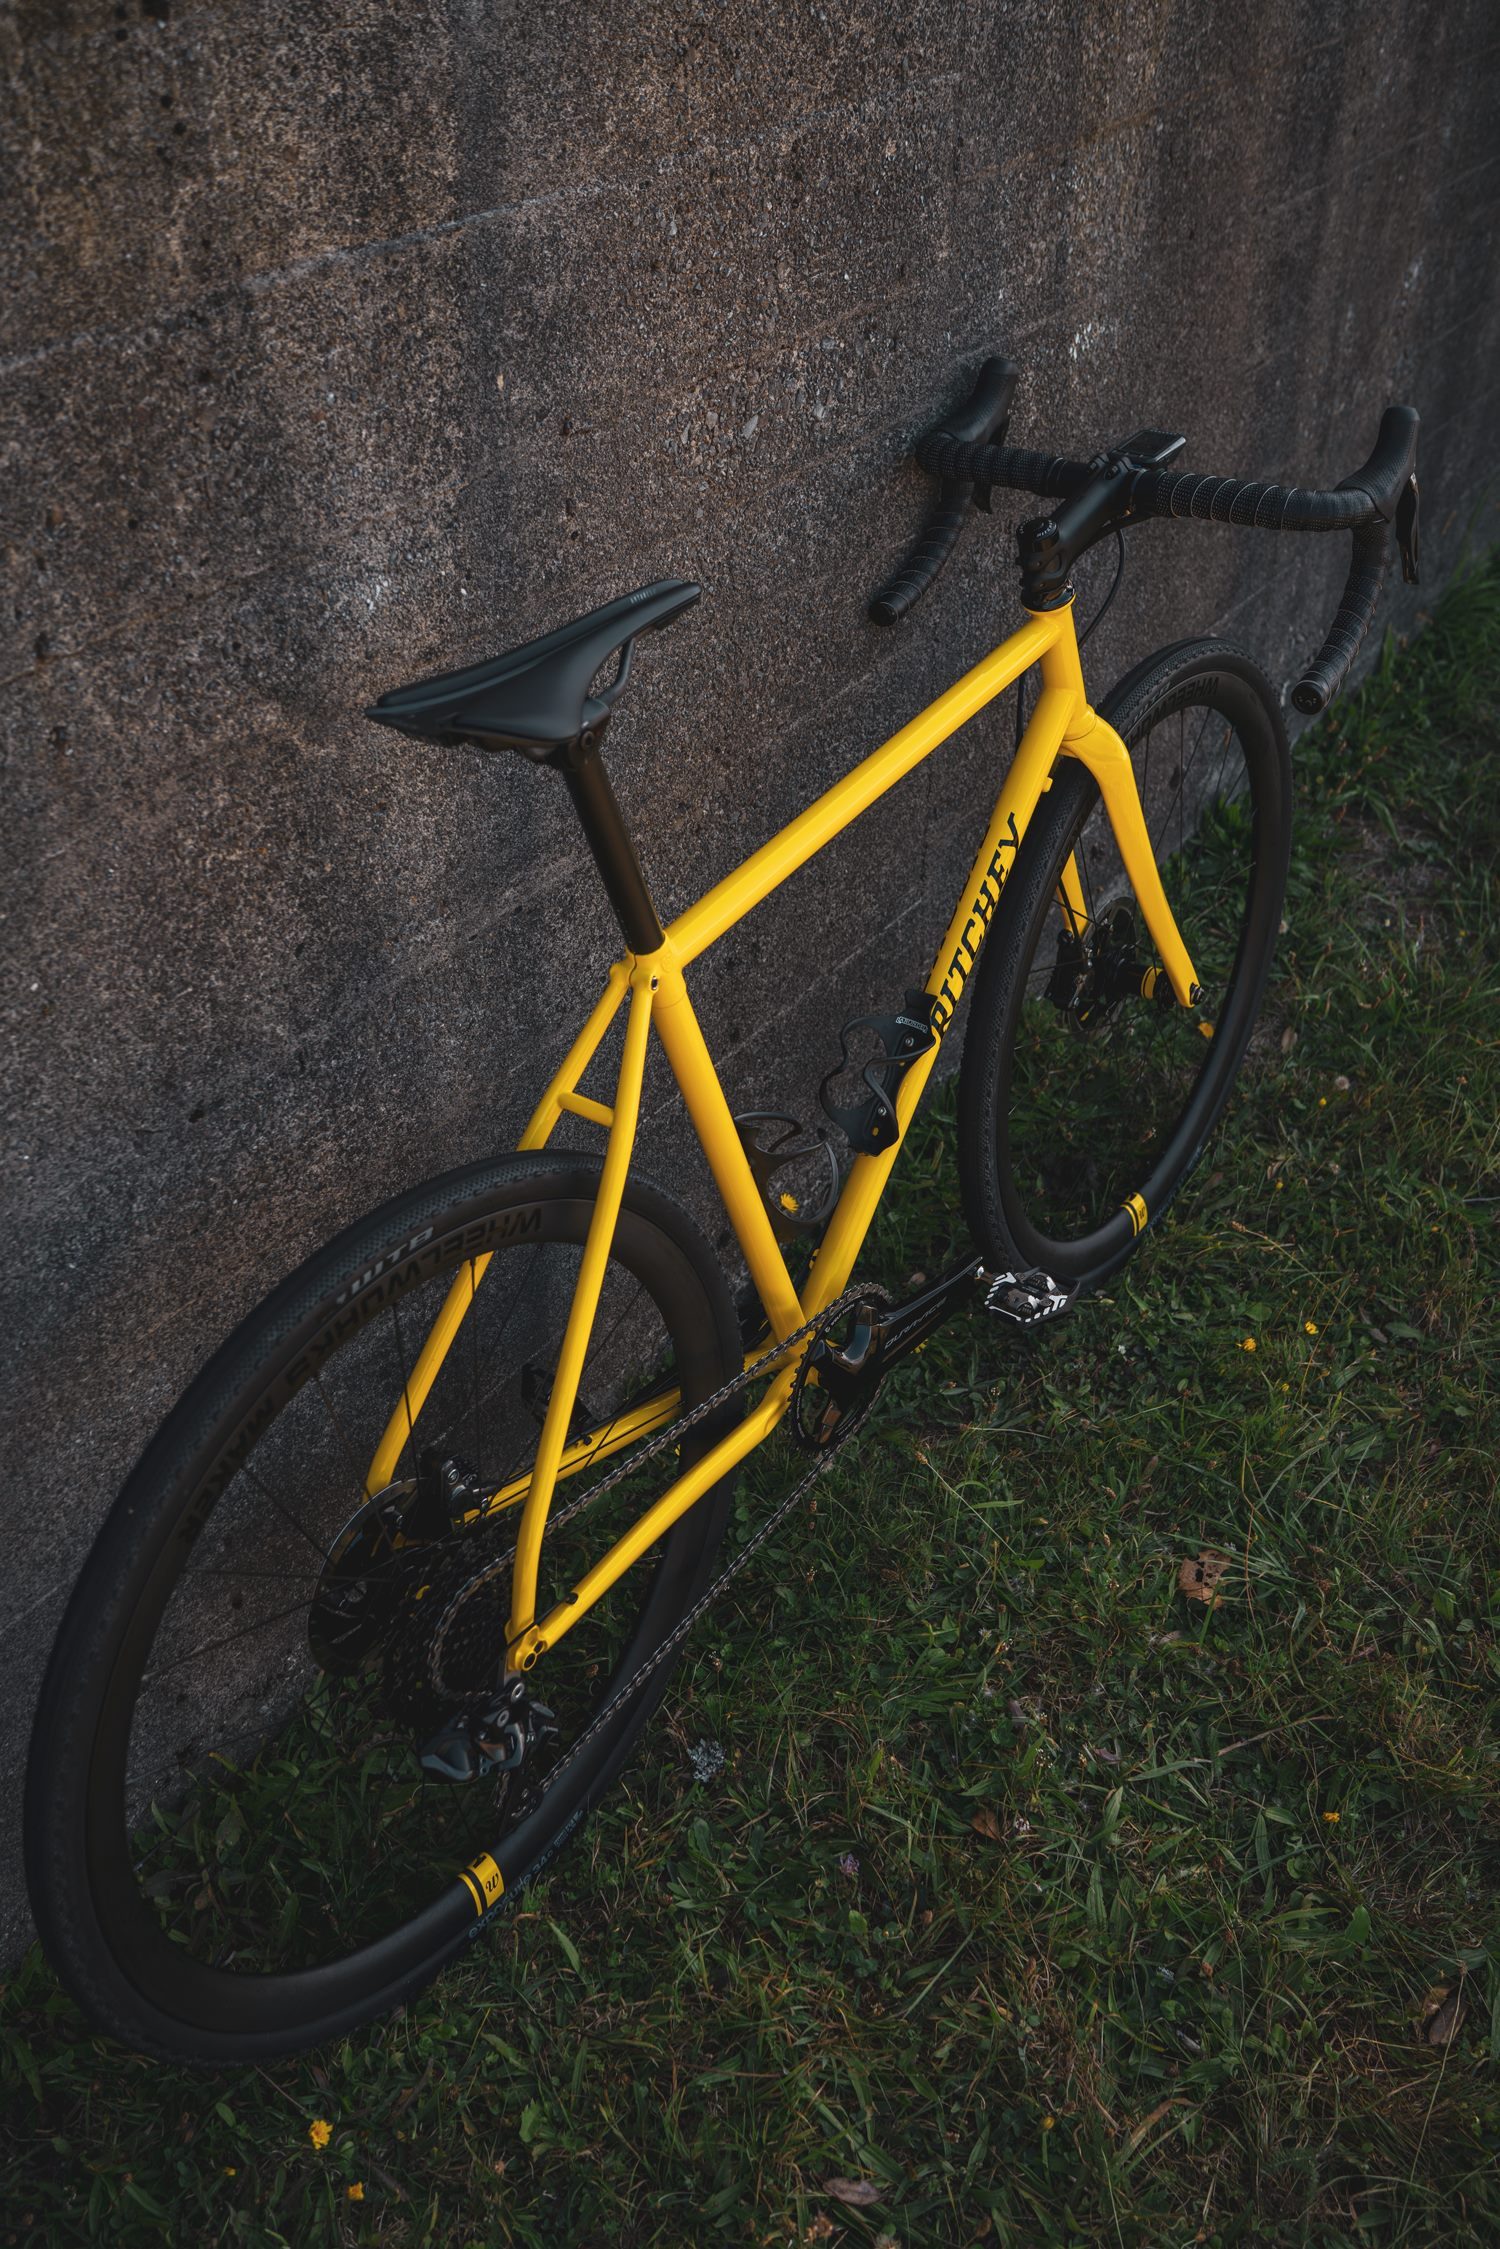
| I think the bike came together really well. It’s super clean and the yellow paint pops in the sun. No doubt Brent will be enjoying exploring the trails and gravel around Wellington…. |
| -Tristan tristan@wheelworks.co.nz 04 387 3592 (NZ) 0064 4 387 3592 (Intl) |
Sensational build – some serious pain finagling all the things, and a dedication to the craft of hand built bicycles that is rare. My Guacamole green Ritchey Outback frame just arrived (inspired by this) – wheel & design choices courtesy of the aforementioned Backie and Robbo as well.
Glad to read the details on the yellow Ritchey Gravel Bike. The combination of black and yellow color gives this bike an awesome look. I like its overall design.